
Table of Contents
So, you are backing up your Ubuntu Server but what happens when you have a failure? or you delete something from the server? How do you go about recovering it? or do you want to move your sites to another server? I’ve used this for when I move from self hosted on a VM on my NUC to a Ubuntu VM in Azure for example.
What do you need to do to recover or move your server? We;;, just follow these simple steps and you should be good to go in next to no time.
- Update the new server to ensure it is running the latest updates
- Install Apache, PHP, MySQL and all the modules on to the newly installed server
- Use wget to retrieve the backup files from the Azure container.
- Extract the backup folder and place the extracted files in to their respective folders on the Ubuntu Server
- Create the database/databases (ensure you use the same database name, username and passwords (if you don’t you will need to update the wp-config.php).
- Restore the database
- Enable the website
Updating the server
First things first update the server with the latest updates bu running the following:
sudo apt-get update
sudo apt-get upgrade
Install Apache, PHP, MySQL and other modules needed
This is the same command as when you installed the original server that hosted your website:
sudo apt-get install apache2 php libsasl2-modules libapache2-mod-php php-gd mariadb-server mariadb-client php-mysql mailutils php-gmp php-mbstring
sudo a2enmod ssl rewrite
And then secure the MySQL installation by running and following the on screen instructions:
sudo mysql_secure_installation Use wget to download the backup files from Azure
So, you could easily download the files and then upload to your server via FileZilla maybe if you wanted to as well but I prefer downloading then directly. To do this you will need to download the backup tar archive which holds all the data, but you’ll also need to download the MySQL backup. In order to download any of these files you will need to generate a SAS URL.
First things first I would need a SAS URL for each file I was wanting to download
Go in to the Azure Blob Container and then go to the Day of which backup you want to recover and click on the backup.tar.gz file
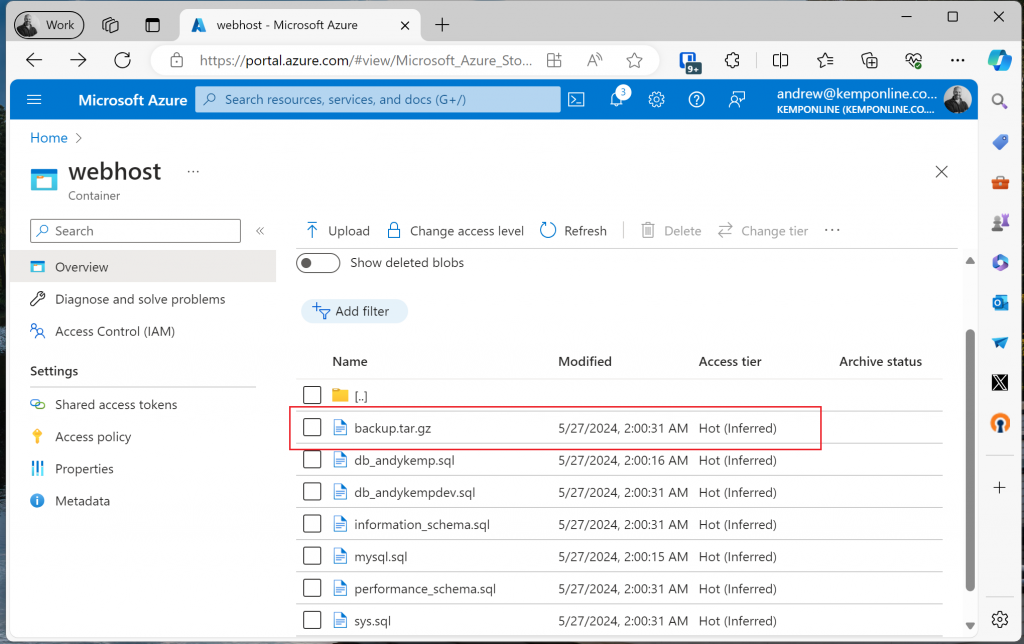
Once in there click on the Generate SAS option.

Leave Read permission selected as default and then click on the Generate SAS Token and URL button at the bottom:
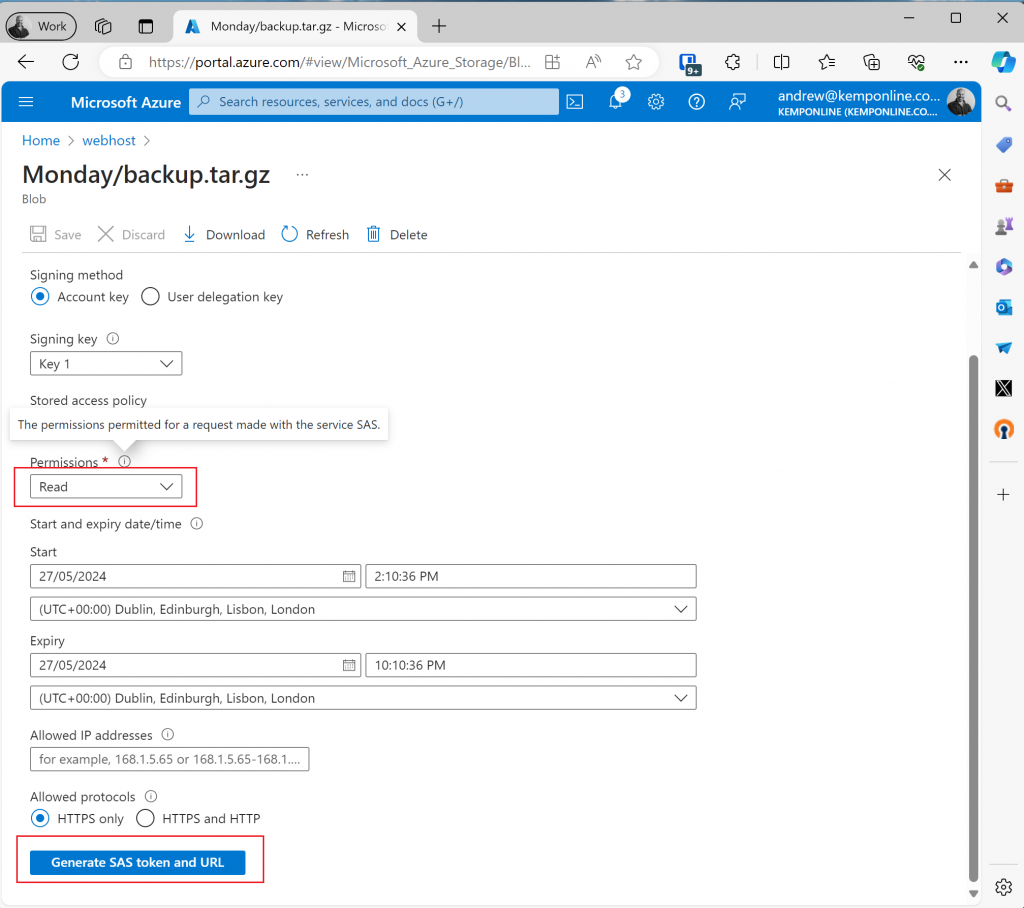
The Blob SAS URL will then be available and will only be valid for the default time limit of 8 hours, you can change that if you want to.

Once you have your SAS URL incorporate it with your wget command:
wget "https://andrewkemp.blob.core.windows.net/webhost/Monday/backup.tar.gz?sp=r&st=2024-05-27T13:10:36Z&se=2024-05-27T21:10:36Z&spr=https&sv=2022-11-02&sr=b&sig=qDFDxBGyepOj34UCaj38DyuK4dCVgGmIDf8FgRIav8c%3D" -O "backup.tar.gz"This will then download the file to your Ubuntu server. you will need to perform this step again to get the SAS URL for each database you want to recover also.
in this case lets just get the db_andykempdev.sql file:
wget "https://andrewkemp.blob.core.windows.net/webhost/Monday/db_andykempdev.sql?sp=r&st=2024-05-27T13:20:40Z&se=2024-05-27T21:20:40Z&spr=https&sv=2022-11-02&sr=b&sig=ZtJDt2aa1uVZYaNSMr377uQskNsh7%2Becy5jXxnel1BA%3D" -O db_andykempdwv.sqlExtract the backup folder and place the extracted files in to their respective folders on the Ubuntu Server
To extract the files run the following:
tar -xzvf backup.tar.gzThis will extract the files and folder in the tree structure they were backed up in to the /home/user folder. For example there will now me a /home/user/var/ with all subfolders and files that were backed up and a /home/user/etc/ and all sub folders and files that were backed up and so on.
Using the following command you can then copy the files and folders to their respective places:
 sudo rsync -av /home/user/var/* /var/
 sudo rsync -av /home/user/etv/* /etc/
This then places all files and folders where they need to be for the websites in the back up to work.
Create the database/databases
Use the same process as before for creating the database, its not essential to set the same username/password, but if you do set them as they were on the old server when you activate the site and point DNS to it you’ll be good to go straight away and not have to update the wp-config.php file.
to start with you will want to enter in the the MySQL CLI on the server then use the MySQL command to create the database:
sudo mysql

CREATE USER user_andykempdev@localhost IDENTIFIED BY 'MyChosenPAssword1234';
GRANT ALL PRIVILEGES ON db_andykempdev.* TO user_andykempdev@localhost;
FLUSH PRIVILEGES;
Exit
Restore the Database
To restore the database run the following:
sudo mysql db_andykempdev < db_andykempdev.sqlThat will restore all information from the backup in to the newly created database
Again, if you were running multiple websites on the server you’d do the same for each database
Enable the website
Once the databases have been restored you can then enable the websites. The website.conf files will be part of the backup and would have been placed in the correct folder in /etc/apache2/sites-available folder. You will enable the sites like you would done initially:
sudo a2ensite www.andykemp.dev
Run that command for each website conf file you have. Once you’ve enabled all the sites run the following command to restart the Apache service on the server:
sudo service apache2 restartPoint your DNS to the servers public IP address and ensure you have the correct rules in place for Ports 80 and 443 and you will be good to go.