
I had a question recently asking about what would be the best solution as a local SMTP relay after ditching the local Exchange Management Server after going purely cloud identities.
There’s a few ways this can be done, using the Windows IIS SMTP service and link in with Microsoft 365, however, to my surprise, this feature has been deprecated: Features Removed or Deprecated in Windows Server 2012 | Microsoft Learn. But one of the draw backs to this is that you would either need a certificate or a licensed exchange mailbox in Exchange Online to use this.
So, this got me thinking. I have SendGrid, and I also have my Postfix server running on my LAMP server can I use that? Sure, I could use SendGrid directly but, this would need me to configure every device (if I was in an org with Multifunctional Devices etc..) to use SendGrid in a secure way, secure being the word here. Sure, you could use it as an open SMTP relay and say anything coming from the public IP Address is allowed but this really is not a good idea, I mean its a REALLY BAD idea.
What would be a good idea then?
Well, a good idea would be a local SMTP relay that all the devices are authorised to connect to and that in turn can relay to SendGrid. You can go one step further and create a few of these locally (one or two at each site) and use either a load balancer or DNS Round Robin at worse to route any local traffic to smtp.yourdomina.com to multiple local IP Addresses. So, My thought process was to use Postfix. you could have a single or multiple installs of Postfix each with the same config to SendGrid, or each with their own API Key. Regardless of API Key each one would have a very similar main.cf file if not identical.
Setting up Postfix
Postfix runs on Ubuntu and requires very little resource, my Ubuntu Server runs with a 30GB HDD and 1GB RAM with dual virtual processors.
Installing Postfix is straight forward:
sudo apt-get install postfixThis command will install Postfix only. If you were to also want to use local commands on the server to send mail messages you’d install it using the the mailuntils install command:
sudo apt-get install mailutilsRegardless of which command you use to install both will install Postfix and prompt you for an installation type. Chose Internet Mail.
Once installed you will need to configure it to use SendGrid. SendGrid offer a detailed guid here: Postfix | Twilio. But the long and short of it is:
- Update the main.cf file
- Obtain the API Key
- Create the credentials file
- Set up the permissions on the credentials file
- Restart Postfix
- Update main.fc to allow a specific IP address to send from
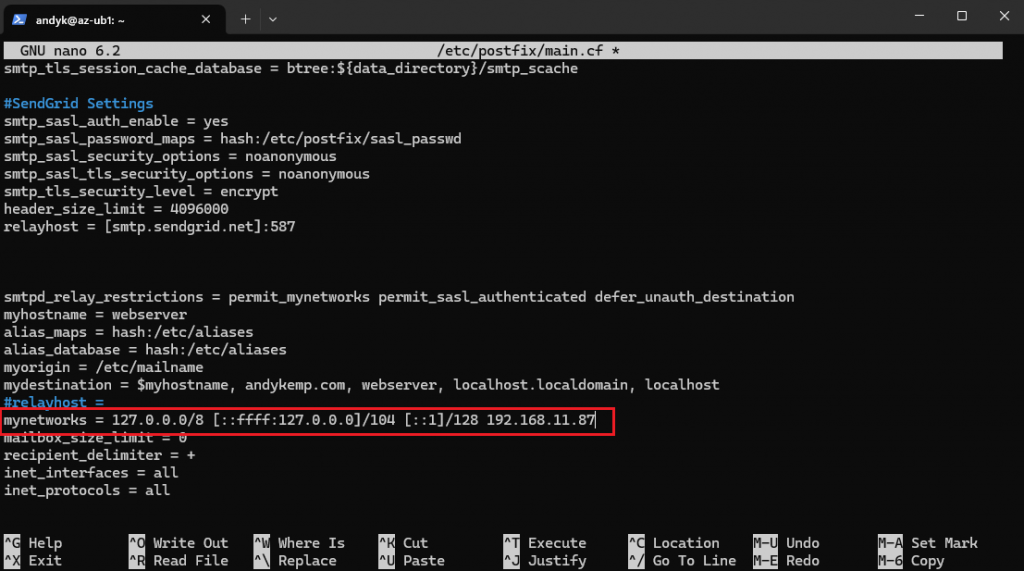
Update main.cf
To Edit the main.cf fila run the following:
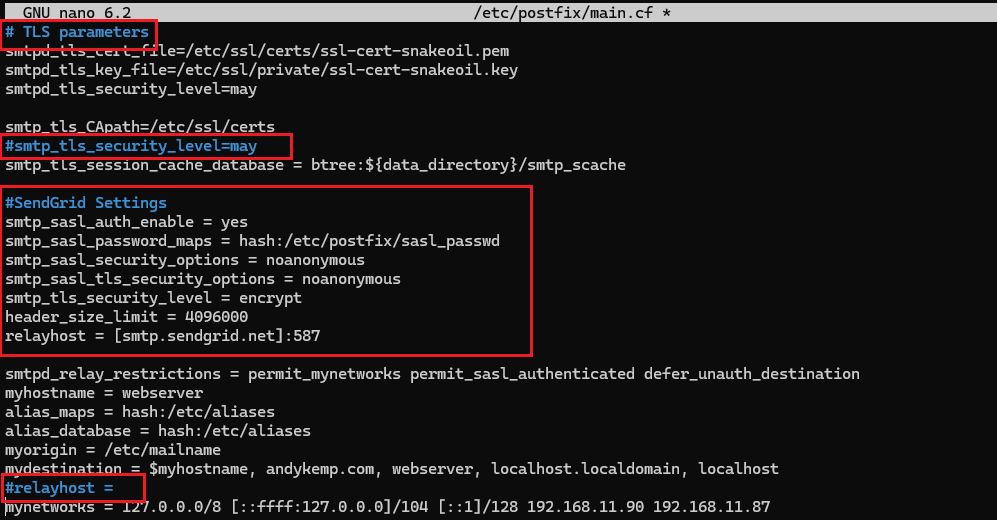
sudo nano /etc/postfix/main.cfAdd the following in to the main.cf file below the # TLS parmeters section
#SendGrid Settings
smtp_sasl_auth_enable = yes
smtp_sasl_password_maps = hash:/etc/postfix/sasl_passwd
smtp_sasl_security_options = noanonymous
smtp_sasl_tls_security_options = noanonymous
smtp_tls_security_level = encrypt
header_size_limit = 4096000
relayhost = [smtp.sendgrid.net]:587
You’ll also need to make a few other edits (both highlighted below):
- comment out the smtp_tla_security_level=may line by adding a # in front of it
- comment out the relayhost = line by adding a # in front of it
You should then end up with the following edits in your main.cf.
Press Crtl+X to quit, and answer Yes to saving the edits.
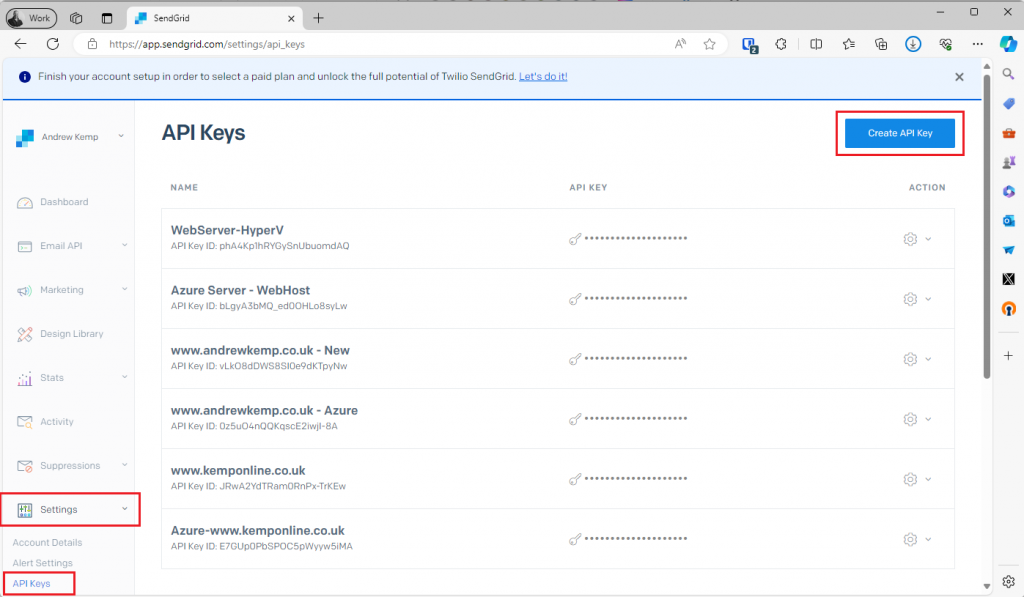
Obtain the SendGrid API Key
At this point you will need to obtain your API Key from SendGrid, So, log in to your send grid account and click on Settings > API Keys > Create API Key
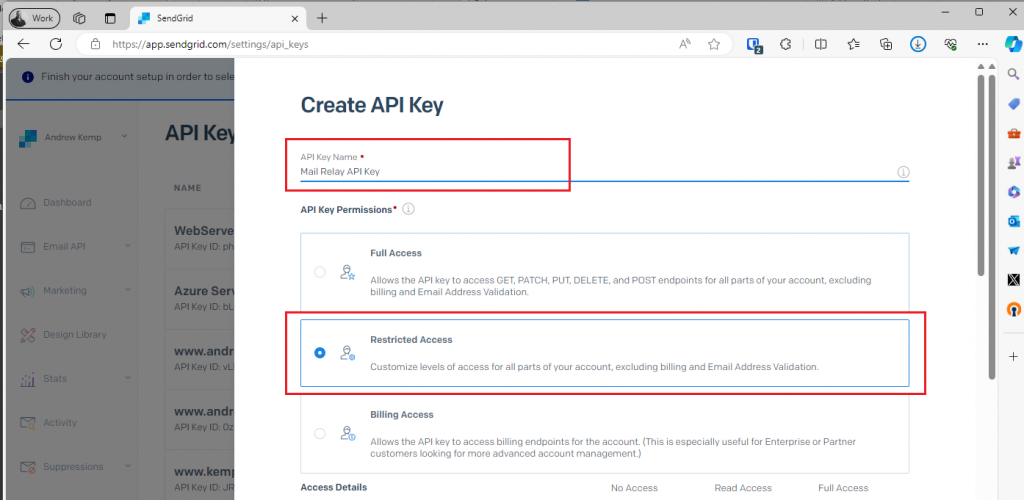
Provide a Name and select Restricted Access:
Then set the Mail Send permission to Full Access then click on Create & View:
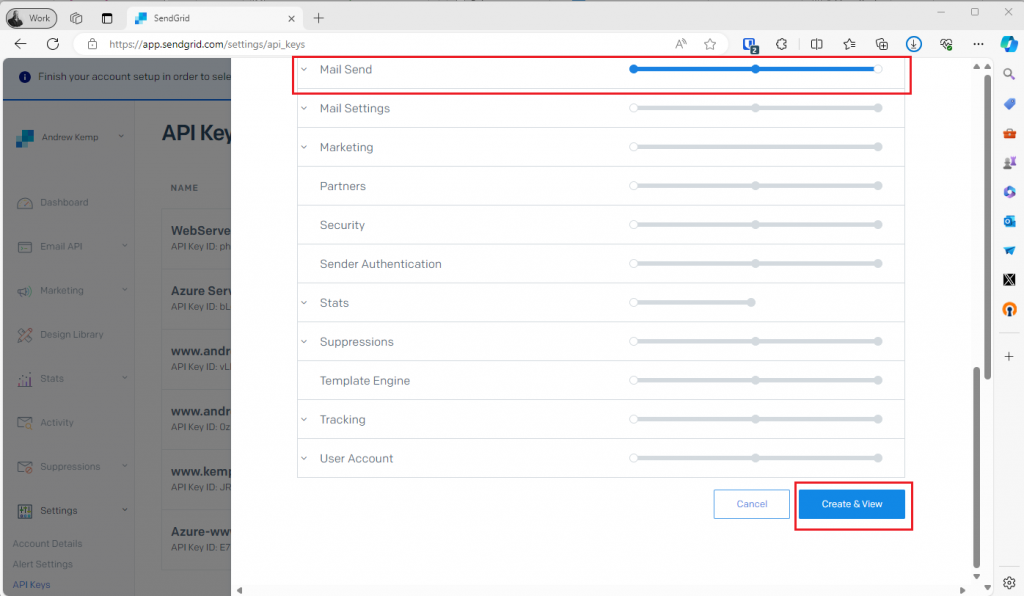
You will then see the API Key, copy this to clipboard or past to notepad
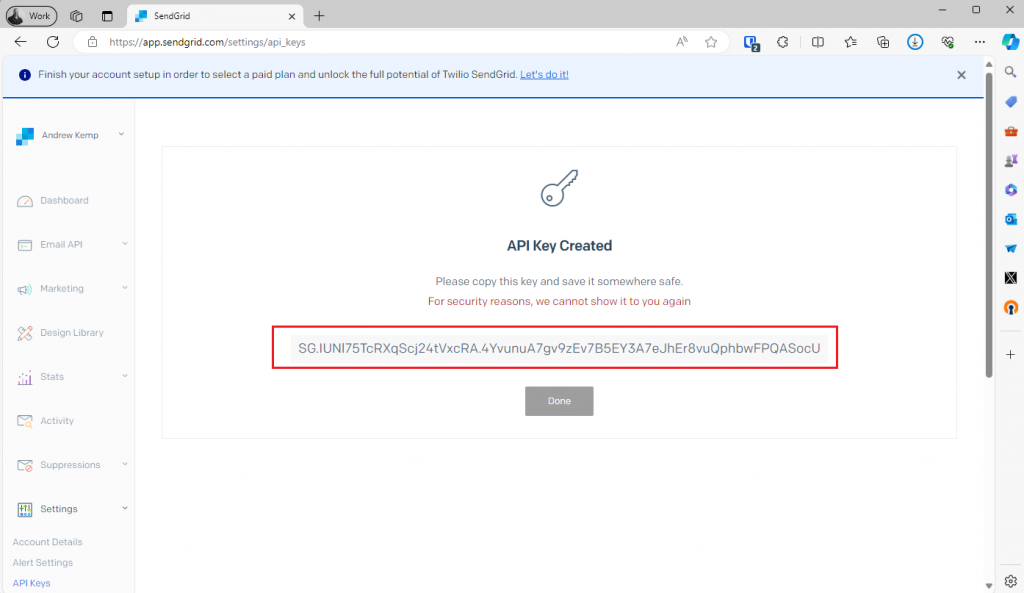
Once you have copied the key click done, you will move away from this page and will not be able to view the key again.
Create the credentials file
Run the following command to create the credentials file:
sudo nano /etc/postfix/sasl_passwdThen add the following to the new file Where the SG.IUNL…. API Key is the one you copied:
[smtp.sendgrid.net]:587 apikey:SG.IUNl75TcRXqScj24tVxcRA.4YvunuA7gv9zEv7B5EY3A7eJhEr8vuQphbwFPQASocUyou will have a file that looks like this:
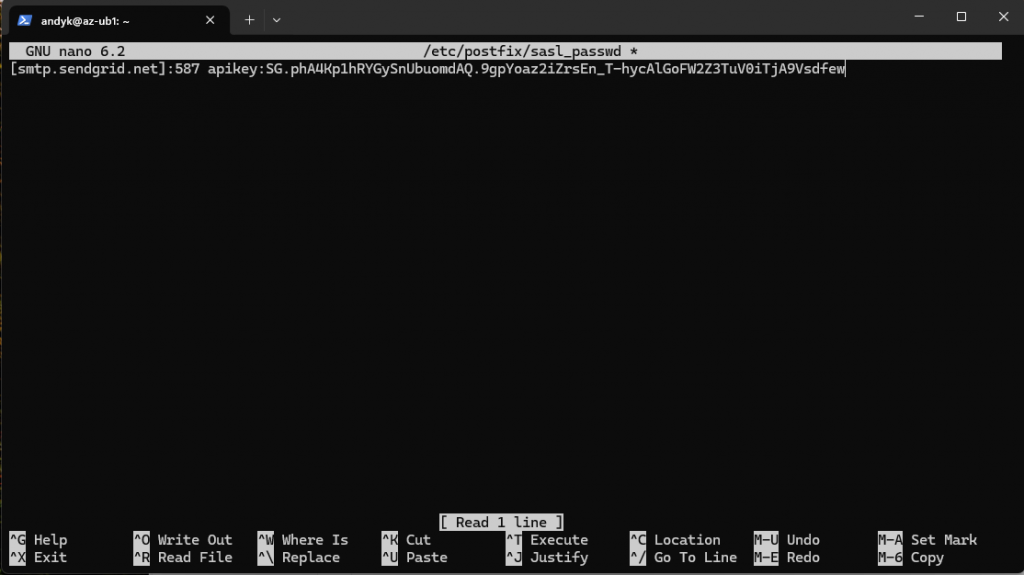
Press Ctrl + X to exit and confirm the option to save the file as you exit.
Apply permissions to the credential file
Once the file has been created you will need to set the permissions so it restricted by running the following commands:
sudo chmod 600 /etc/postfix/sasl_passwd
sudo postmap /etc/postfix/sasl_passwd
Restart Postfix service
Finally once all has been setup restart the Postfix service by running the following command:
sudo service postfix restartAllow a device to relay through Postfix
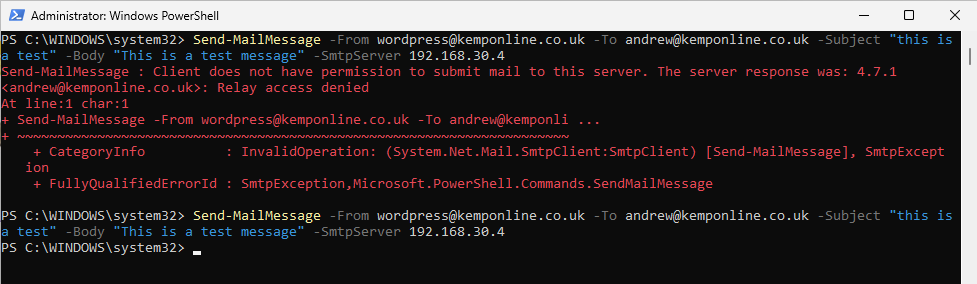
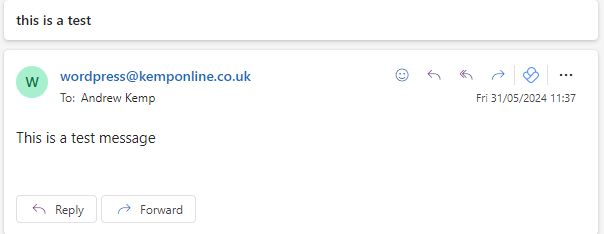
So, everything is in place now, you go to a device to try and send an email. For testing I use the Send-MailMessage CMDLet in PowerShell and I receive this error:
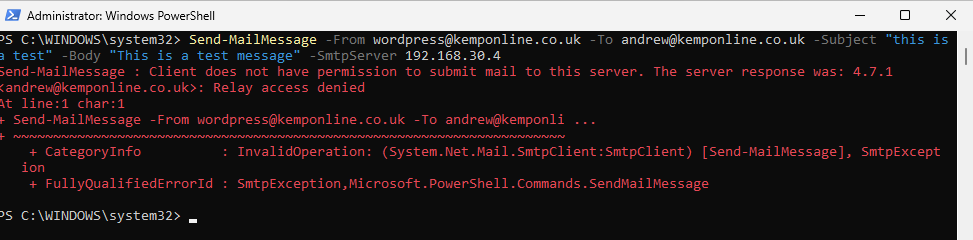
Through updating the main.cf file, specifically the mynetworks section and adding the IP address of the device I was trying to send the message from it will then work:
Conclusion
In my view this is a great lightweight SMTP relay service you can deploy internally. You can then copy the main.cf and the sasl_passwd files and distribute them to newly deployed servers as and when you need to scale up the number of relays, or have one/two servers at each site. Each with the same main.cf and sasl_passwd file or if preferred a separate sasl_passwd credential file to maintain a separate API Key for each server but that will add additional overhead. You can create a scheduled task so that when you update the main.cf of the “primary” server it will distribute the updated copy to the other servers on a scheduled task, meaning you only have to update the authorised senders once.
Was this helpful?
Let me know what you think!