
Table of Contents
Introduction
There are many ways to establish a VPN between my UDM and Azure andI’ve tried them all, but, for the best result I would still recommend using an Azure Virtual Network Gateway. However, that does come with a price tag! Sure, there is the basic Virtual Network Gateway SKU that you can use which is a fraction of the cost (circa £30 a month). What about if you’re using an MCT/MPN or subscription that has limited credit (£125 a month or so) then even with a basic VNG you’ll still eat through your credit pretty quickly.
I’ve used OpenVPN Access Server in the past as a Site to Site, which is great but there are a few hoops to jump through, and you still needed to deploy a VM on premises as well as in the cloud. Plust you were limited to 2 concurrent connections with the free edition. Ultimately, I wanted to use my UDM, and something in Azure that would not eat into my MCT and MPN Free Credits
So, what if I told you, you can create an IPSec Site-to-Site VPN from your home to Azure using a £3.50 per month Ubuntu VM with strongSwan – IPsec VPN for Linux, Android, FreeBSD, macOS, Windows installed on it? I’m serious you can! For home use I would say this is by far the best solution I’ve come across to date.
You may be asking yourself “do I need a UDM or a router that supports IPSec to get this working?” IT certainly helps and makes it easier if you do, but, no, you don’t NEED a UDM/IPSec Router. You can do this by deploying a Ubuntu VM if you have a lab environment at home. But, for this example I am assuming you have a device that supports IPSec Site to Site.
What do I need for this setup
You don’t need a lot for this setup, all you need is the following:
- A router that supports an IPSec Site-to-Site VPN (This is the device I use: Ubiquiti UDM UniFi Dream Machine Router: Switch Router AP AC Wificontrol Gateway : Amazon.co.uk: Computers & Accessories)
- An Azure Subscription I use my MCT, but this will work with any type of Subscription
What do I need to deploy in Azure
You will need to deploy a few resources in Azure:
- A Resource Group
- A Virtual Network
- A Virtual Machine I used a Standard B1ls Ubuntu VM costing approximately £3.50 a month
- A Route table
First things first, I created Virtual Machine, when you create a new Virtual Machine, you are able to create a new Resource Group and Virtual Network.
As these resources are core to my cloud infrastructure I wanted create these all in the one Resource Group. You can then add to the Resource Group, or as long as the new servers are in the same region create them in a new Resource Group but still attach to the vNet for the IPSec VPN.
Creating the Virtual Machine
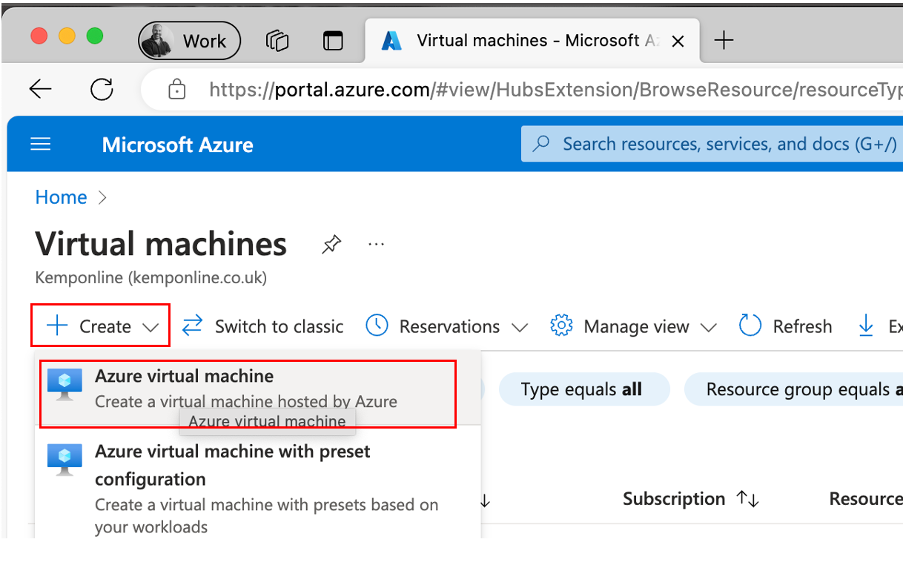
In Virtual Machines in Azure click on Create and select Azure virtual machine.
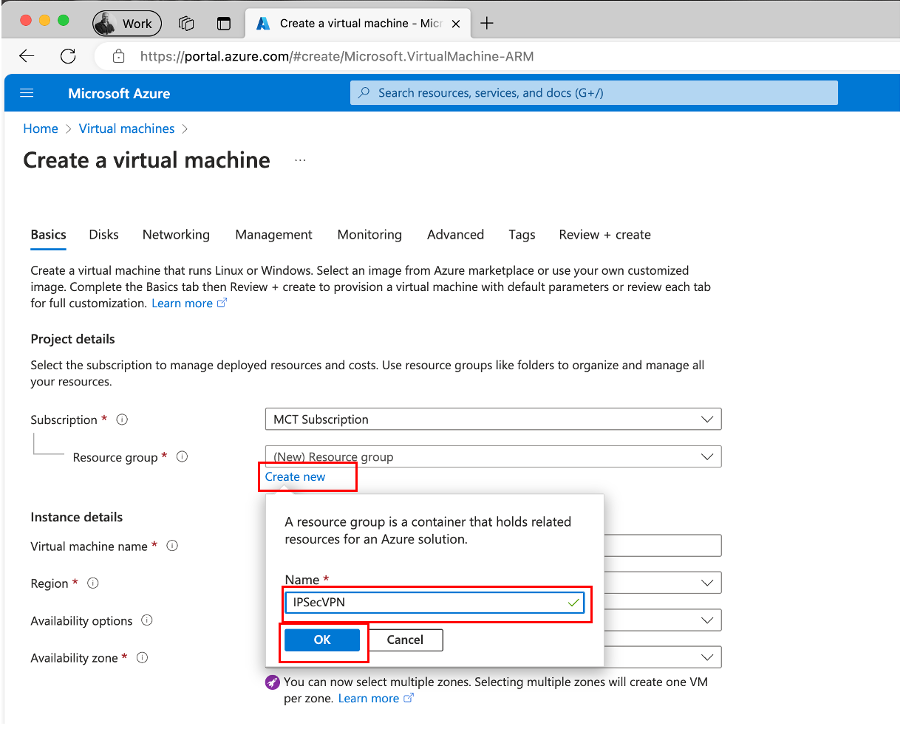
Select your Subscription, then select Create new for the resource group and specify its name and then click OK.
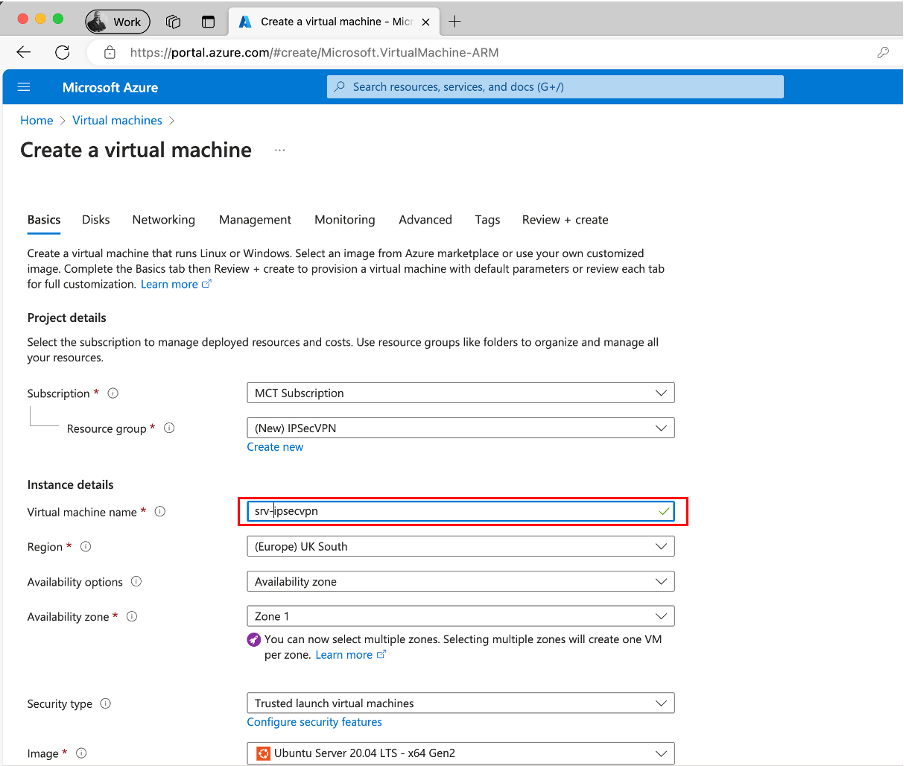
Specify the Virtual Machine Name:
The set the size of the VM and set the credentials:
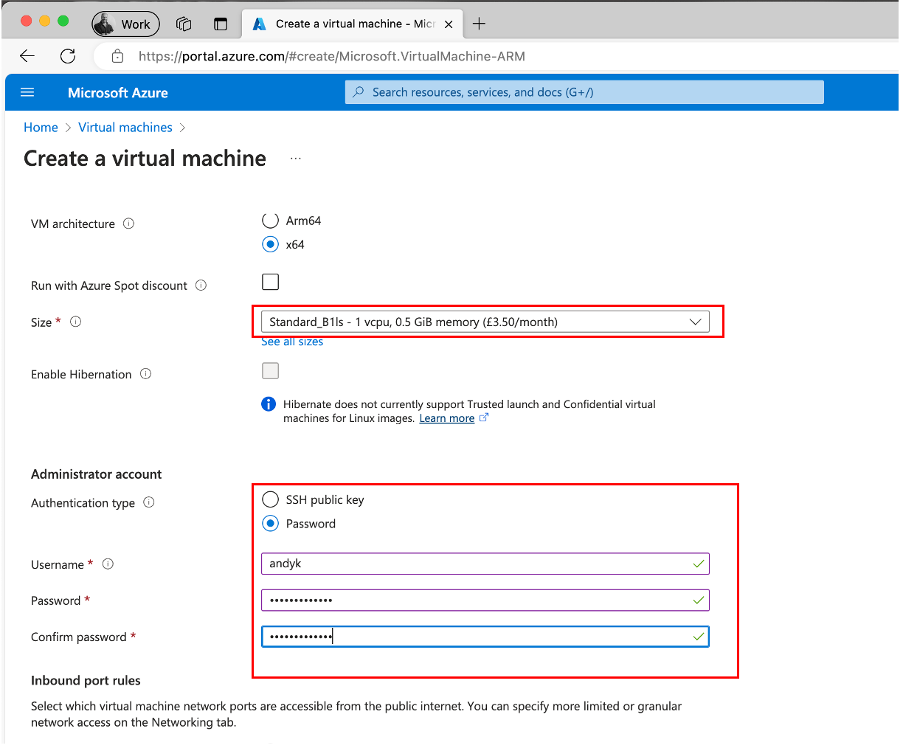
For now, allow access via SSH (this will be updated later on).

Then click on Next: Disks >, You can skip the disk section, as this will be left as it is, we’re more interested in creating the Network, so click Next: Networking >.
Click on Create new then fill in the details of the network, you can leave as default if you prefer, but I like to use specific subnets etc…

Then you’re good to go, you can add tags etc.. or if you’re using an MCT or MPN Subscription you may want to go to the Management tab and disable the auto shut down, so you do not wonder why the next day you cannot access servers in Azure via their internal IP Addresses.
Go to Review + create, review the settings and if you’re happy click Create.
Virtual Machine Azure config settings
Once the infrastructure is deployed in Azure you need to update the following Virtual Machine settings:
- Enable IP Forwarding
- Set a Static IP Address
- Restrict Access to SSH
- Set the Ports for the IPSec VPN
1. Enable IP forwarding
To enable IP Forwarding on the VPN Server go to Networking and then click on the servers network adapter:
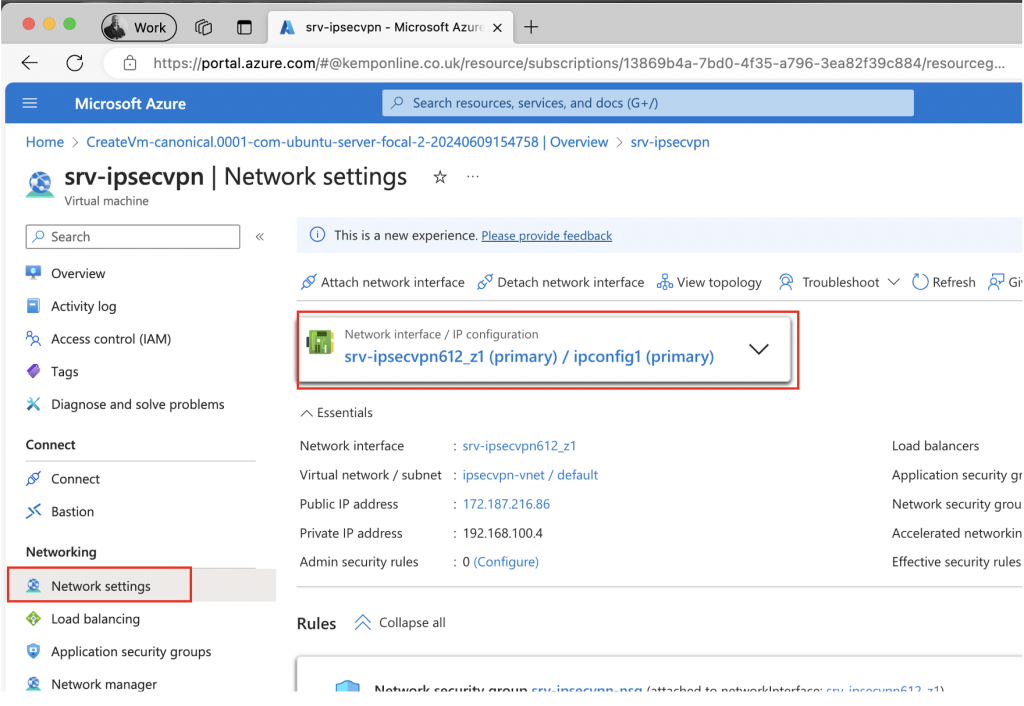
And select Enable IP Forwarding:
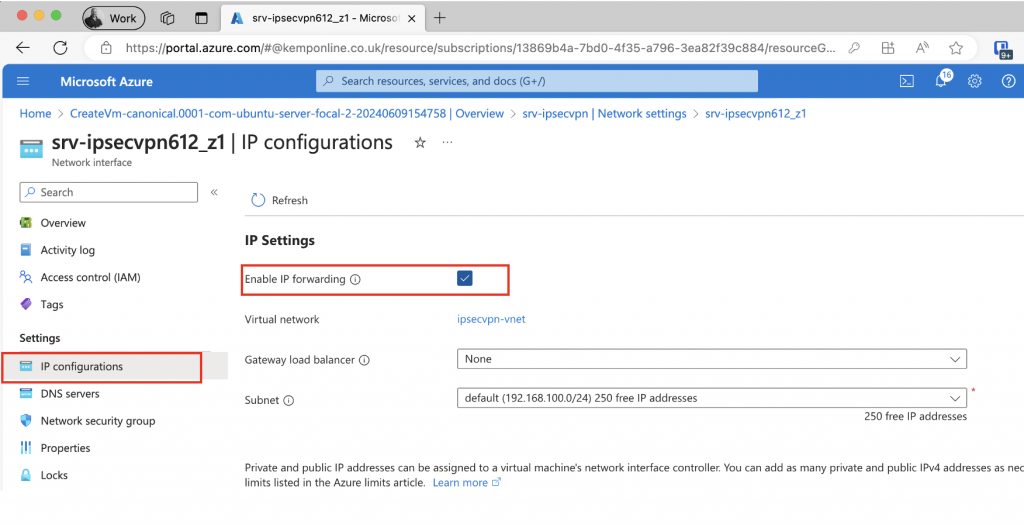
Click Apply, but stay in this section.
2. Set a static IP Address
To set a Static IP address click on the ipconfig1 property:
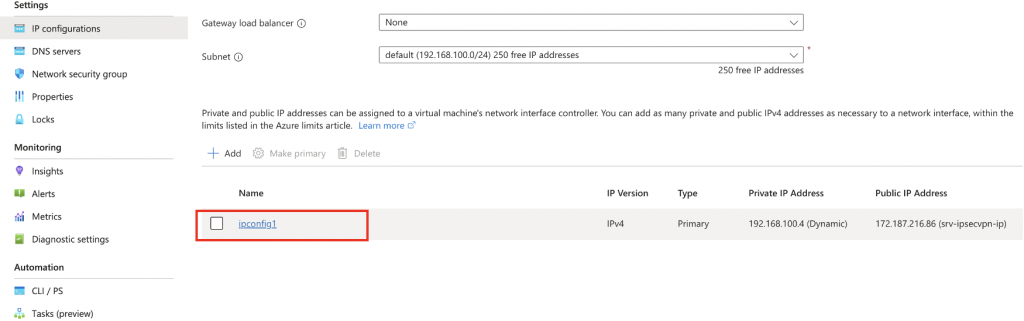
And then set the private IP to static, you can change the IP address if you wish, but personally I’d keep it as the default.
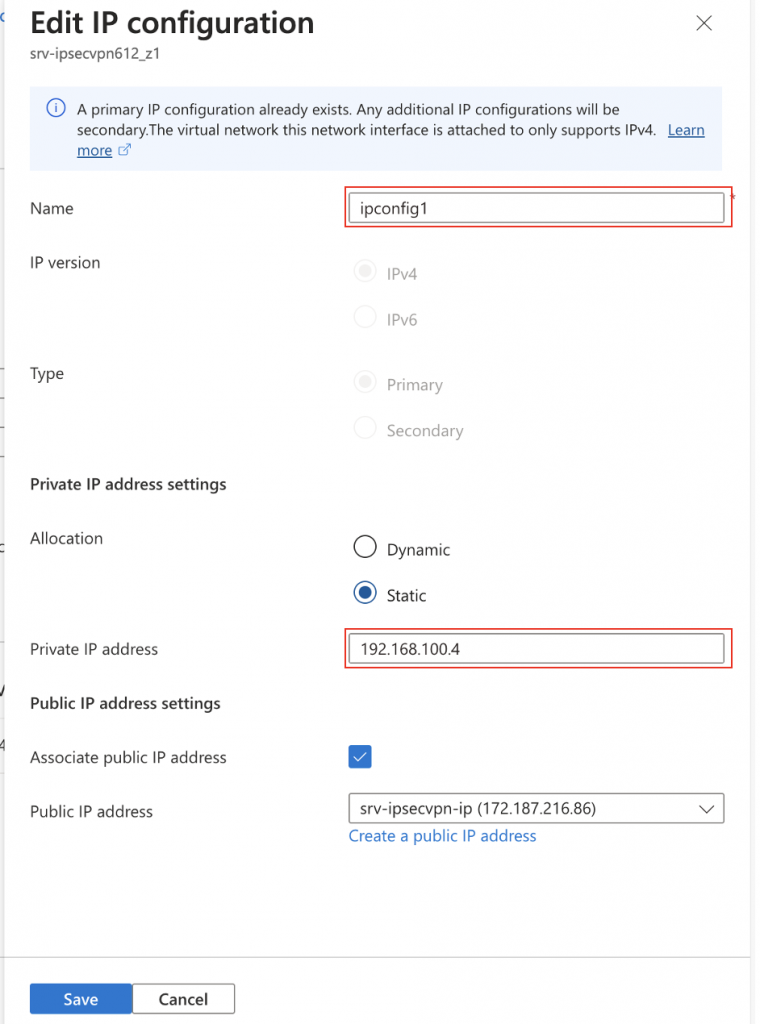
Then click Save.
3. Restrict Access to SSH
To restrict access to SSH go back to the VM Properties and go to networking and select the SSH rule:
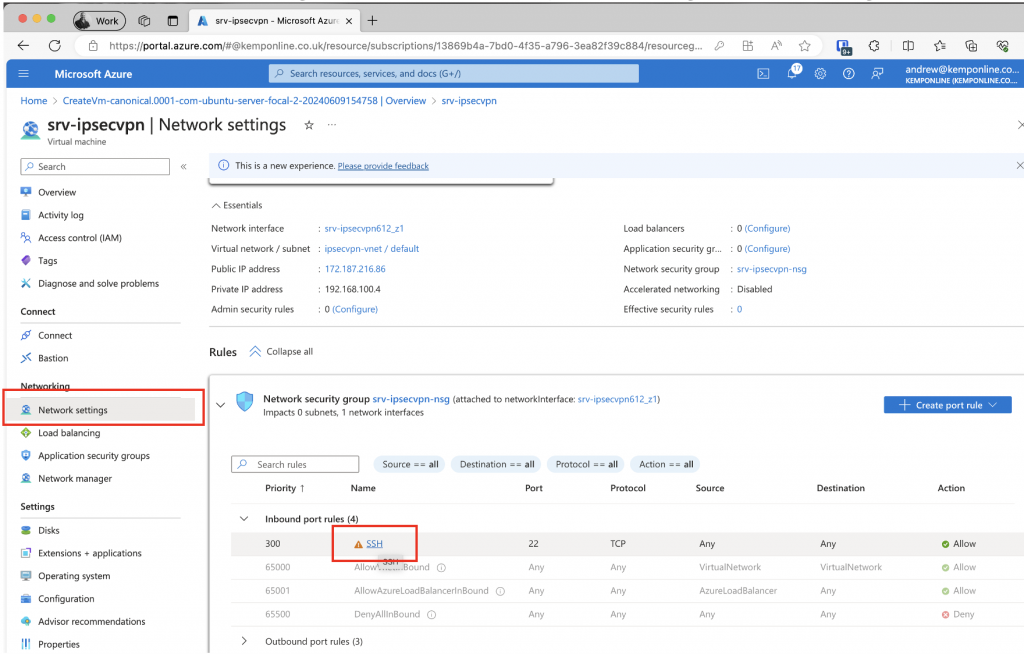
Set the SSH Rile to only allow from My IP Address:
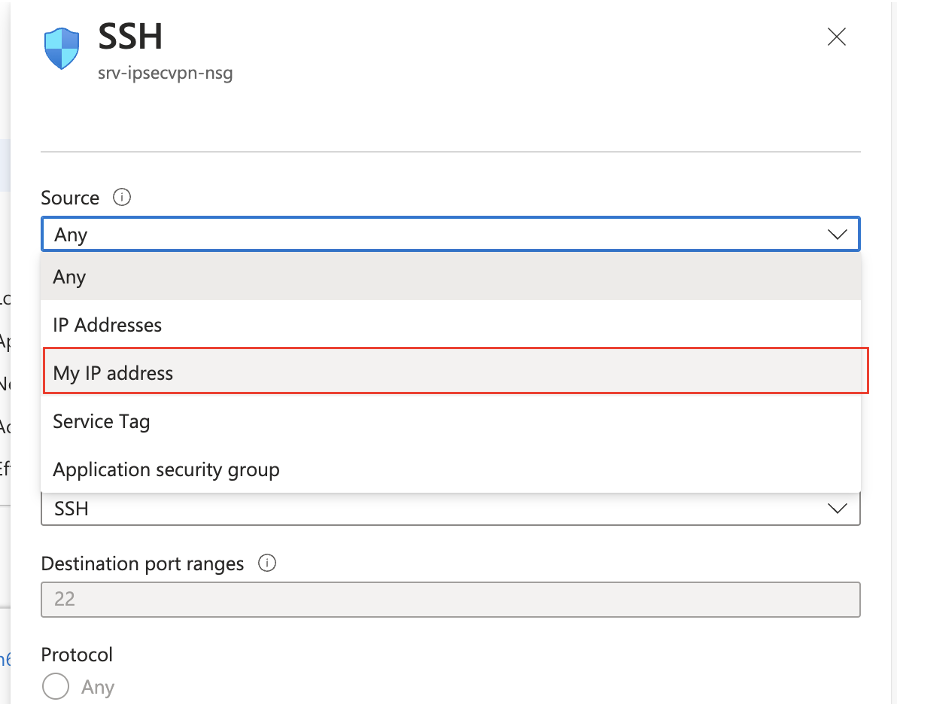
Click Save.
This will restrict access to the VM from public Endpoints and only allow from your public IP address.
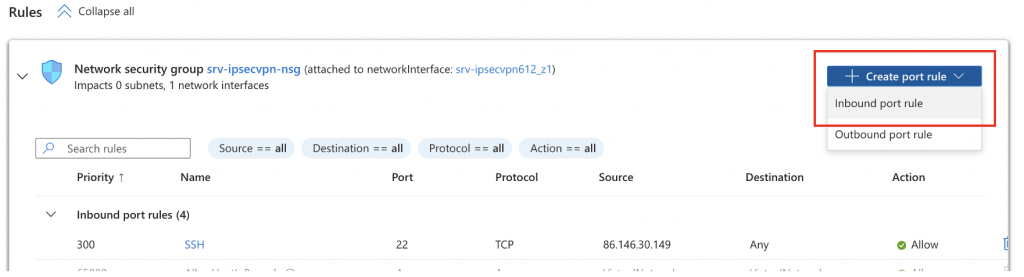
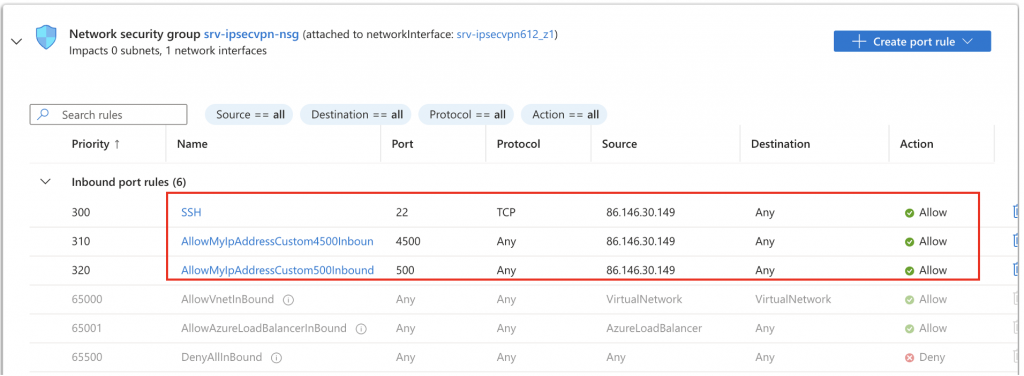
4. Configure the Ports for the IPSec VPN
IPSec communicates over Ports 500 and 4500 UDP
Staying in the same pane click on Create port rule and select Inbound port rule:
Again you can lock this down to only your public IP address if you want to. But remember if you have a dynamic IP address from your ISP you’ll need to update this.
Create a new port rule for port 4500 leave the Protocol as any or set to UDP only. Then click on Add.
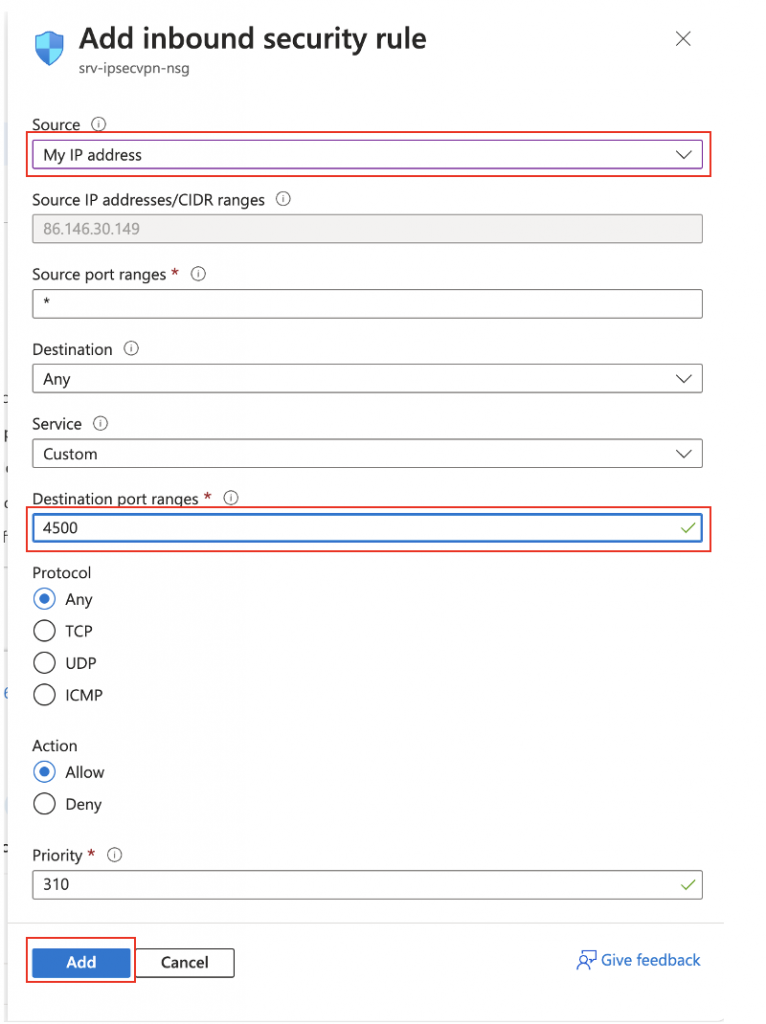
Repeat this for Port 500.
You will then have the following:
Ubuntu Update and Config
You will need to perform the following tasks on your Ubuntu VM:
Update Ubuntu
Firstly you’d best update your install. Log on to your Ubuntu via the public IP Address from your terminal:
ssh andyk@172.187.216.86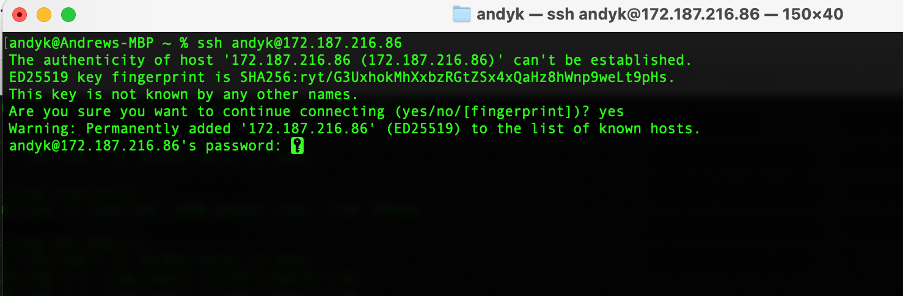
Accept any key fingerprint prompt and then enter in the password set in the VM creation.
Then run the following command to check for updates and also update:
sudo apt update && sudo apt upgrade -y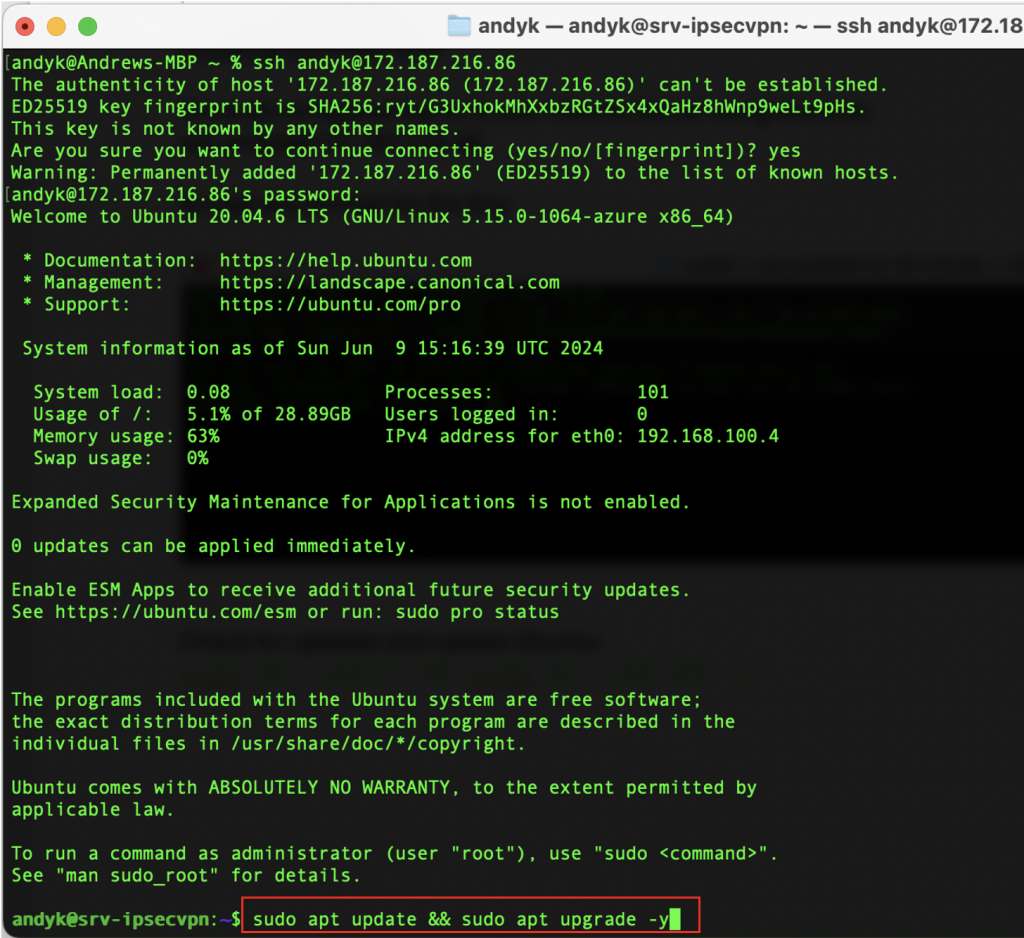
Install strongSwan IPSec
One updated you’re ready to install strongSwan. Run the following command:
sudo apt-get install strongswan -y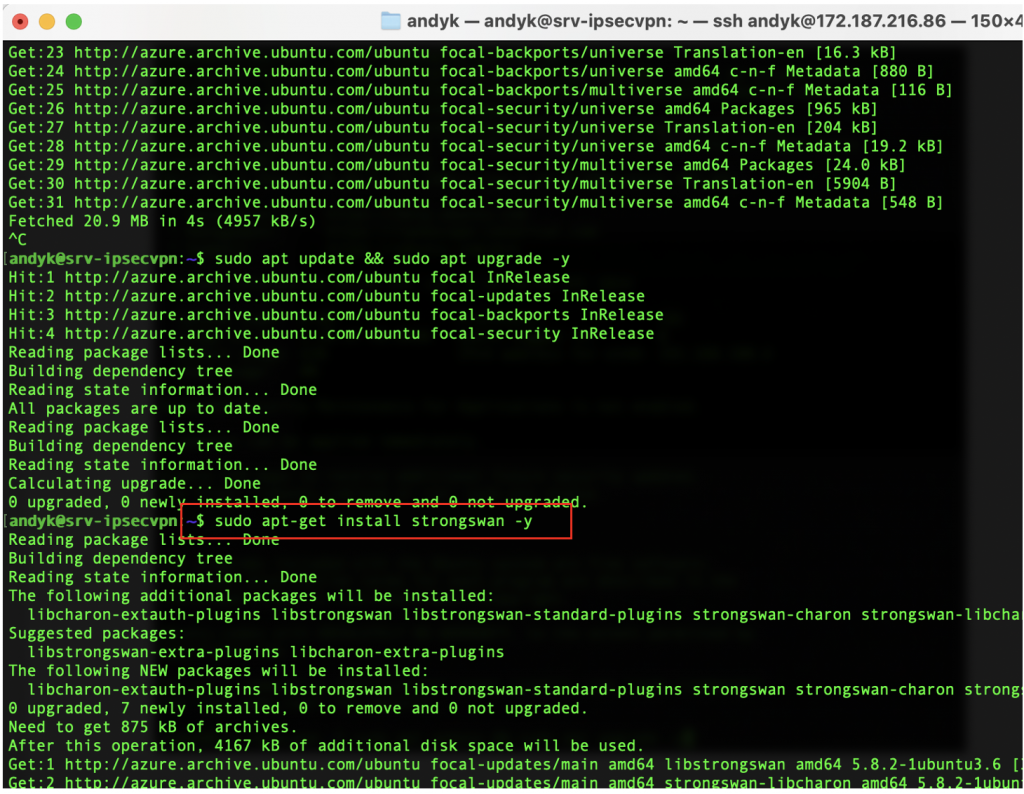
StrongSwan Configuration requirements
There are a few things that need to be configured in order to use strongSwan:
- Enable IP Forwarding in Ubuntu itself
- Create the Pre-Shared Key
- Setup the Pre-Shared Key secret file
- Setup the IPSec config file to connect to your UDM (or gateway of your choice)
1. Enable IP Forwarding
To enable IP Forwarding within Ubuntu you need to make a simple update to the sysctl.conf file by editing it by running:
sudo nano /etc/sysctl.confRemove the # in front of the line with #net.ipv4.ip_forward=1:
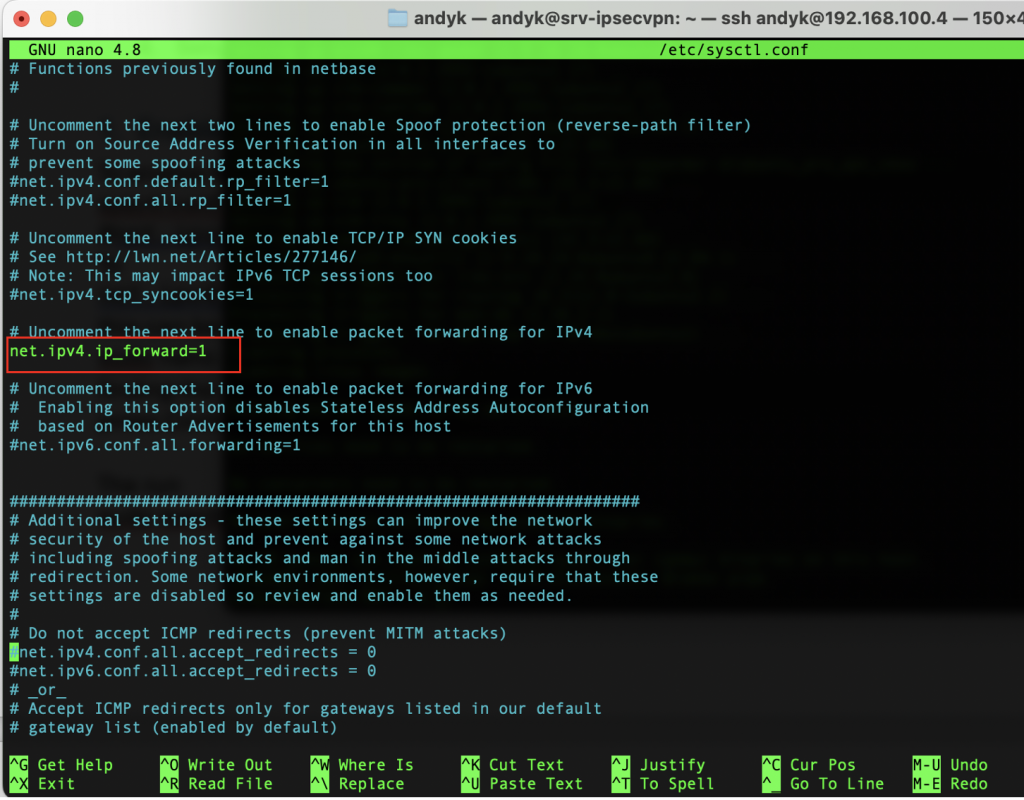
Run the following to reload the config without having to restart the server
sudo sysctl -p2. Create the pre-shared key
To create the pre-shared key that will be used for the IPSec connection run the following command:
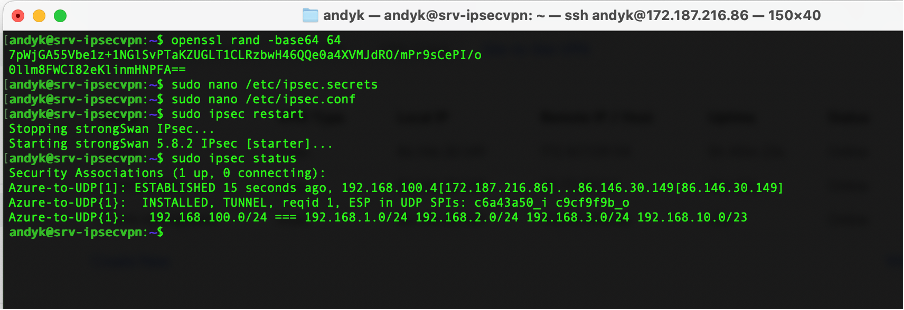
openssl rand -base64 64
Remove the hard return in it so its all on one line:
“7pWjGA55Vbe1z+1NGlSvPTaKZUGLT1CLRzbwH46QQe0a4XVMJdRO/mPr9sCePI/o0llm8FWCI82eKlinmHNPFA==”
3. Setup the pre-shared key secret file
The format of this file is split in to 4 sections:
- Source IP Address (the VM’s public IP address)
- Target IP Address (UDM Public IP
- Encryption Method
- Key
So my entry would be: 172.187.216.86 86.146.30.149 : PSK 7pWjGA55Vbe1z+1NGlSvPTaKZUGLT1CLRzbwH46QQe0a4XVMJdRO/mPr9sCePI/o0llm8FWCI82eKlinmHNPFA==. So edit the ipsec.secrets file:
sudo nano /etc/ipsec.secrets
Exit from the editor (remembering to save the file). Then you need to set up the connection information.
4. Setup the IPSec config
The next thing is to setup the IPSec config to do this you need to edit the ipsec.conf file:
sudo nano /etc/ipsec.confAdd the following under the config setup section:
config setup
  charondebug="all"
  uniqueids=yes
  strictcrlpolicy=no
Then add at the bottom of the file your connection info my case it is like this:
# connection Azure to UDM
conn Azure-to-UDM
	authby=secret
	left=%defaultroute
	leftid=172.187.216.86
	leftsubnet=192.168.100.0/24
	right=86.146.30.149
	rightsubnet=192.168.1.0/24,192.168.2.0/24,192.168.3.0/24,192.168.10.0/23
	ike=aes256-sha2_256-modp1024!
	esp=aes256-sha2_256!
	keyingtries=0
	ikelifetime=1h
	lifetime=8h
	dpddelay=30
	dpdtimeout=120
	dpdaction=restart
	auto=start
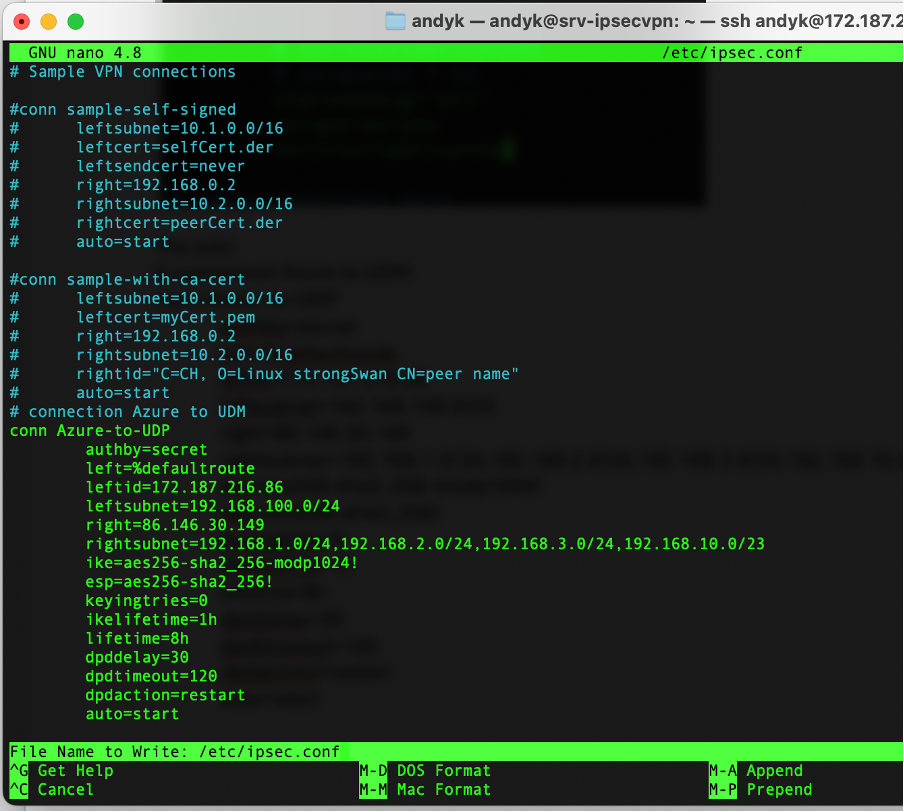
The “left” details (leftid, leftsubnet) are the source details so the public IP address of the Azure machine and the vNet subnet.
The “right” details (rightid, rightsubnet) are the target details so the public IP address of your router and your private subnet details. Separate multiple subnets with a comma.
That’s the VPN configured on the Azure Side, next you need to configure your UDM to connect to the VPN
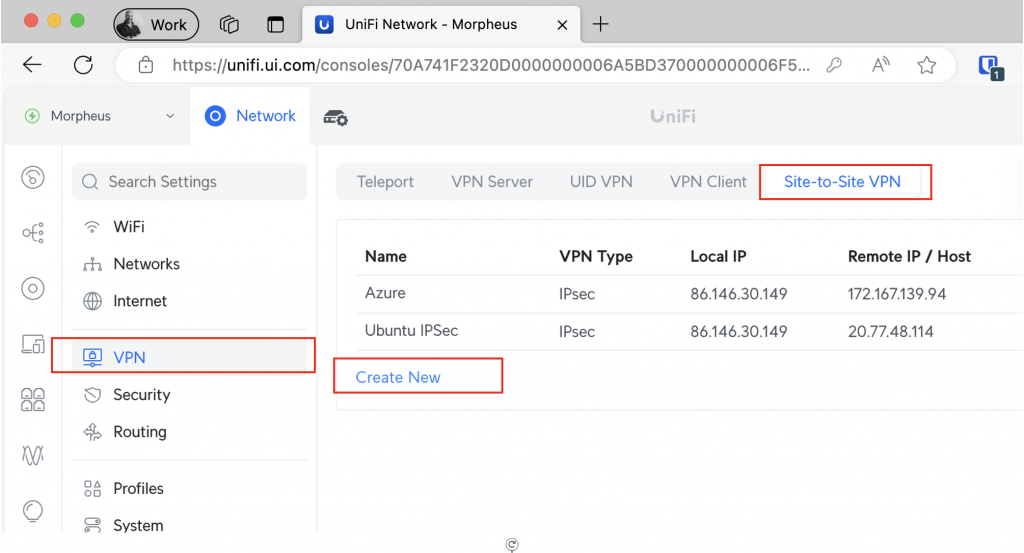
UDM Setup to connect to the Azure strongSwan server
The next thing to do, is to create the connection from your local Gateway/Router. This setup is specific to the UDM I use, however, if you have another type of Router that allows IPSec Site-to-Site VPN’s I am sure it will be a similar process.
Go to VPN, Site-to-Site VPN, and click on Create New
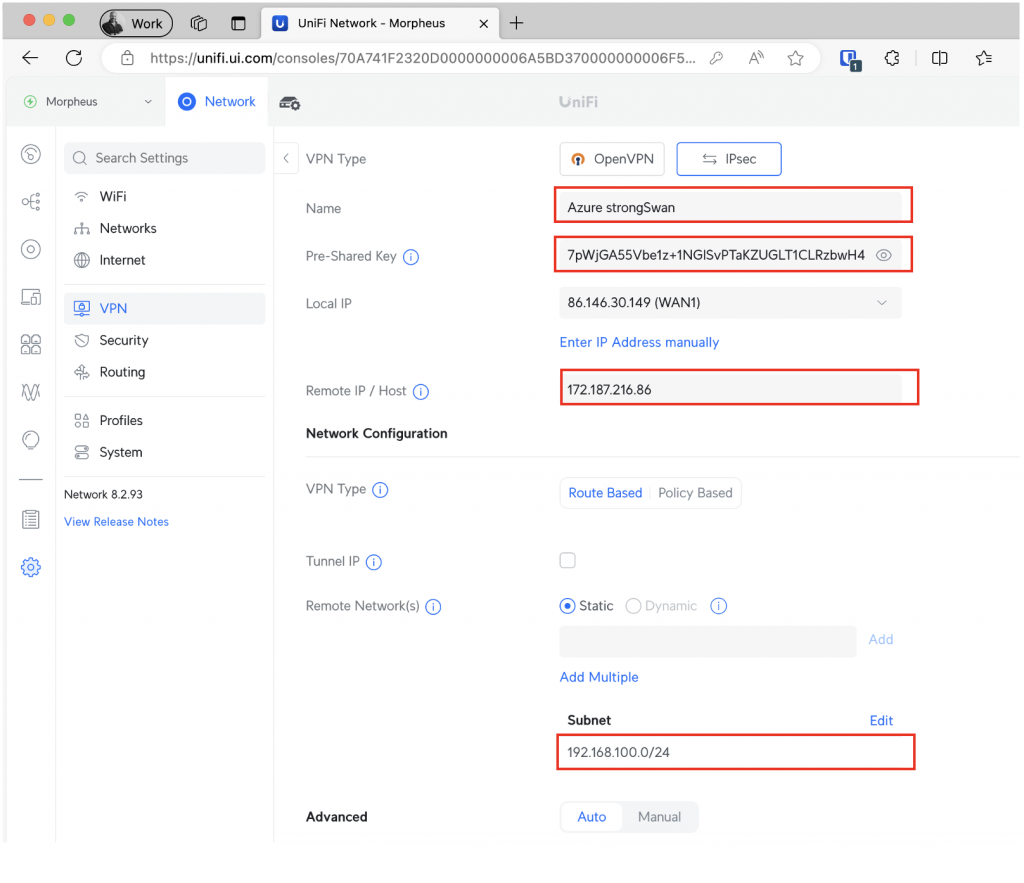
Fill in the details of your specific setup:
- Name – will be something meaningful to your
- Pre-Shared Key – (the key you created above)
- Remote Host/IP – the public IP address of the Azure machine
- Remote Network(s) – the subnets you’re connecting to in the Azure vNet
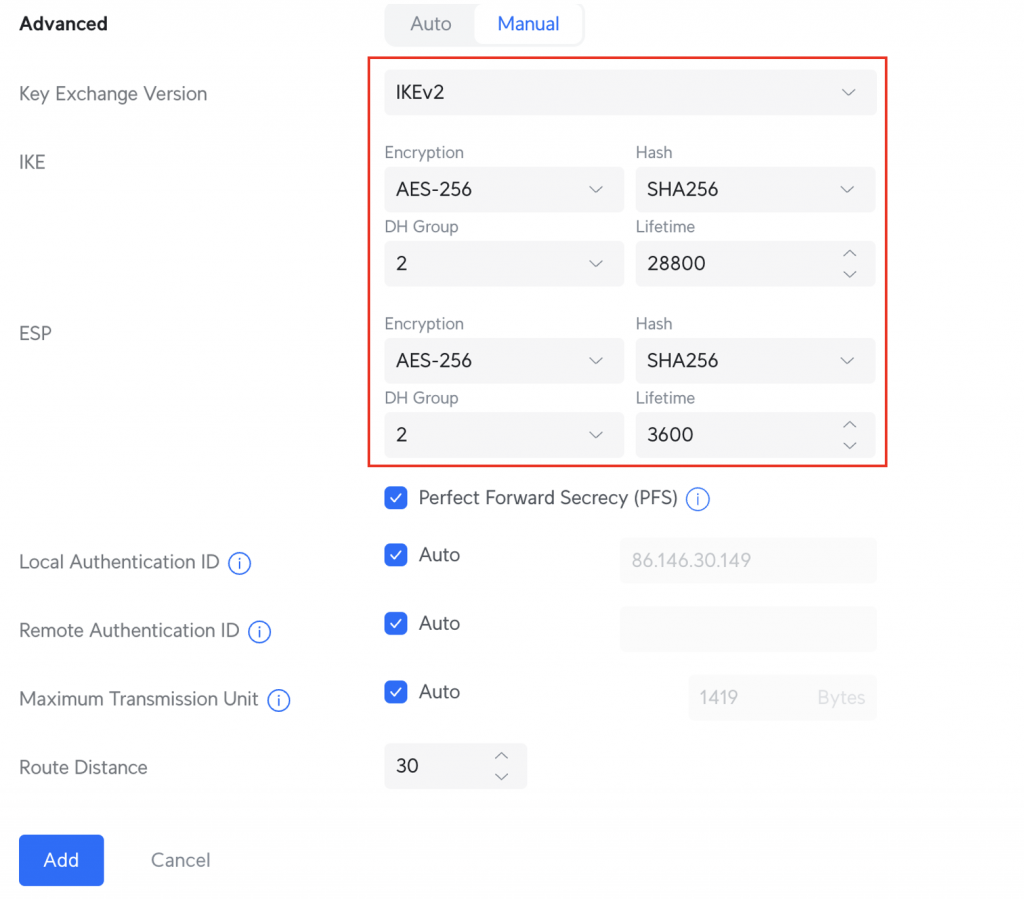
Select Manual in the Advanced options and ensure your settings match the below settings:
- Key Exchange Version – IKEv2
- IKE Encryption – AES-256
- IKE DH Group – 2
- IKE Hash – SHA256
- IKE Lifetime – 28800
- ESP Encryption – AES-256
- ESP DH Group – 2
- ESP Hash – SHA256
- ESP Lifetime – 3600
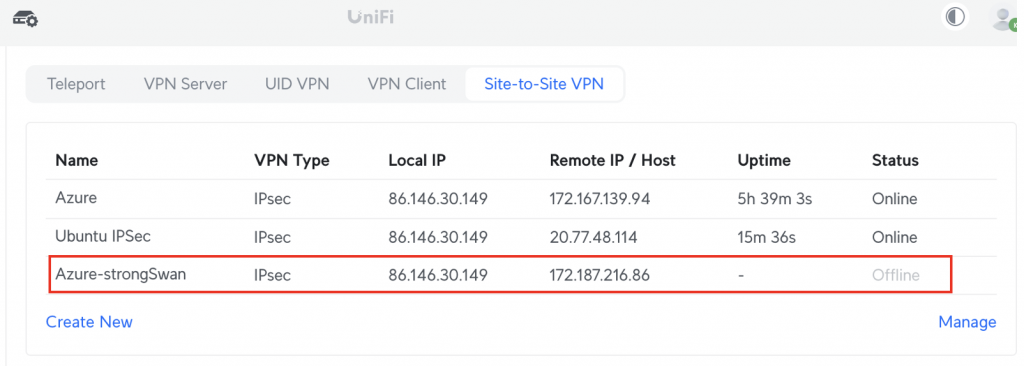
Click on Add and then go back to the VPN list and you’ll see the newly created VPN listed:
Starting the VPN
This should then initiate automatically, however if not you can start the VPN by running the command:
sudo ipsec restartThen to check the status of the VPN run:
sudo ipsec statusand you should then see the following:
You’ll also see it is up in the UDM Portal:

What if I cannot do this via my Gateway/Router
Its not all lost if you cannot do it via your Gateway/Router, if you have a home lab, you could spin up a local Ubuntu VM and configure the same on premises, and then add static routes to allow traffic to flow.
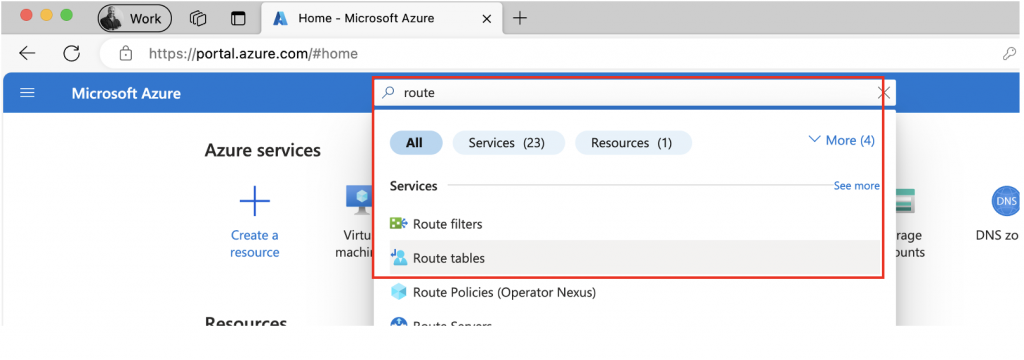
Create a route table
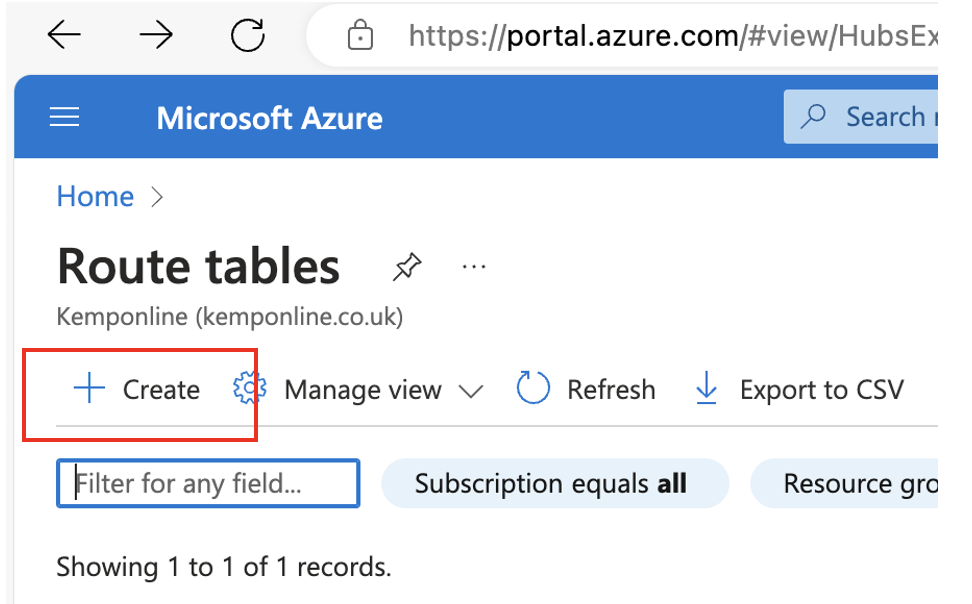
Now that the VPN is established local clients behind the UDM will be able to connect to VM’s in Azure no problem, however Azure Machines on that network will not know where to route traffic to for the subnets behind the UDM, so you will need to create a Route Table in Azure to route all traffic for the subnets behind the UDM through the Azure machine. To do this search for and select Route Tables:
Then click Create
Fill in the details of the route table and ensure you’ve specified it to be in the same rehion as the network.
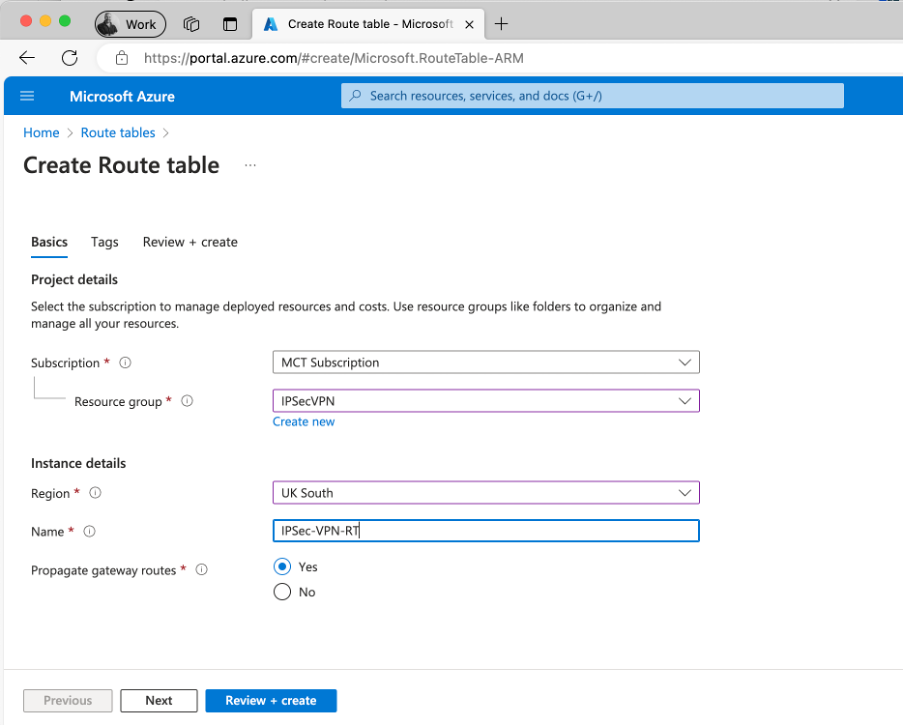
Click Review + create. Then click on Create once you’re happy with the review.
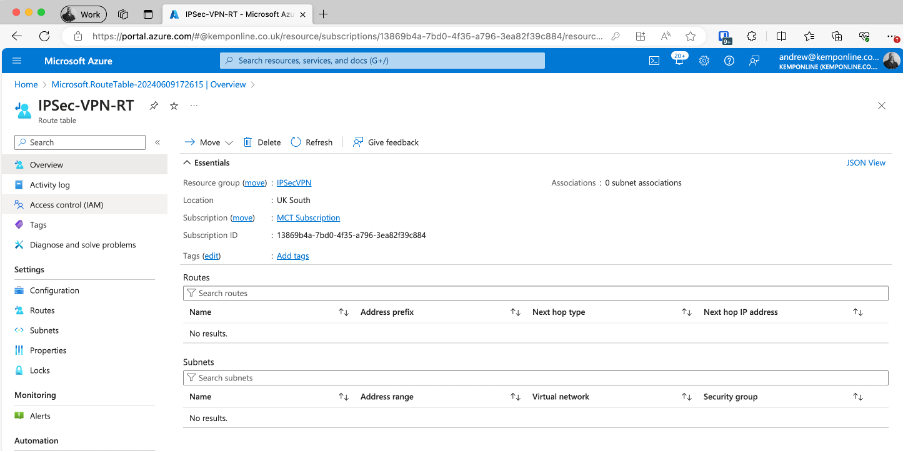
Once created click on Go to resource.
At this pint the route table is created but not associated to any subnets or have any routes to it.
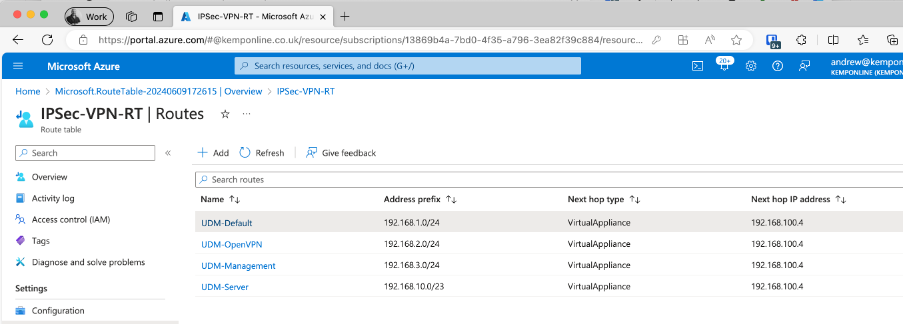
Add the routes to the Route Table
The purpose of the route table is to get all machines in the virtual network to use a virtual appliance (the strongSwan server) as the next hop for any traffic that is behind the UDM, this is why you want to assign a static IP address to this device, as if it did change then you’d need to update all the routes.
Click on +Add:
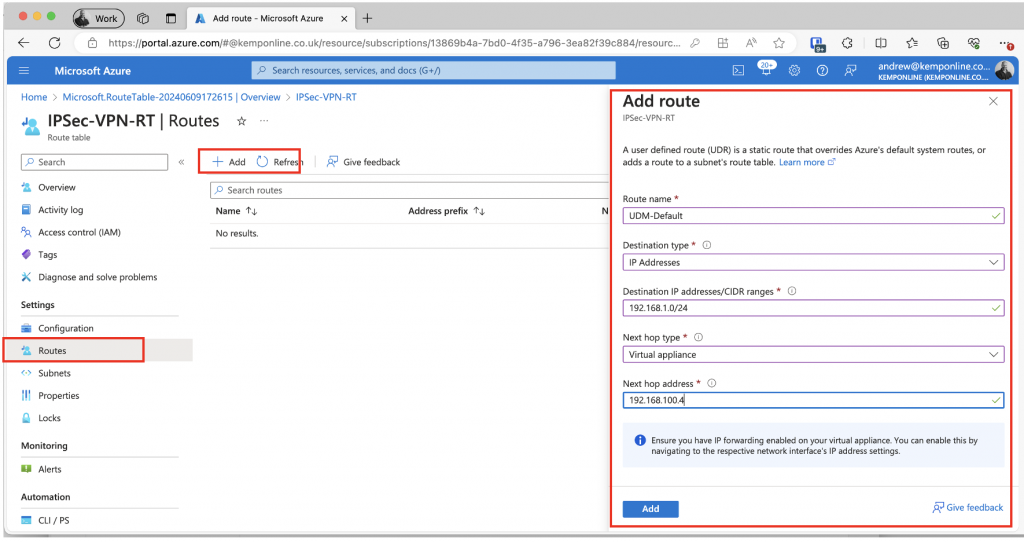
Fill in the route details. Add a route for each Subnet on your home/lab LAN if you have multiple subnets. Once added you you’ll see them all listed:
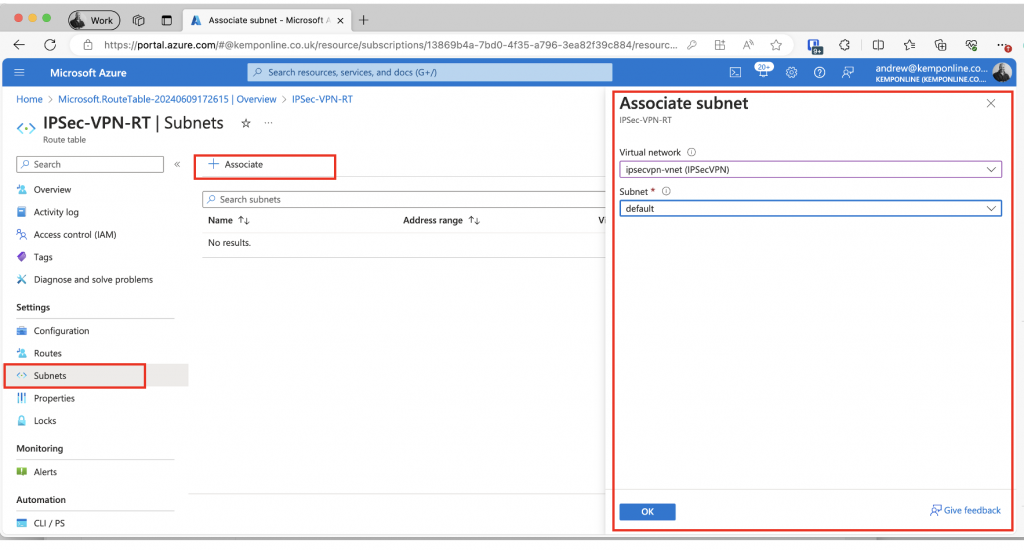
Associate the Route Table to the vNet Subnets:
You now need to associate an Azure subnet to the route table. Click on Subnets in the left hand tree, Then click Associate, select the vNet and subnet you want to associate this route table to and click OK:
Once associated you will see it listed:
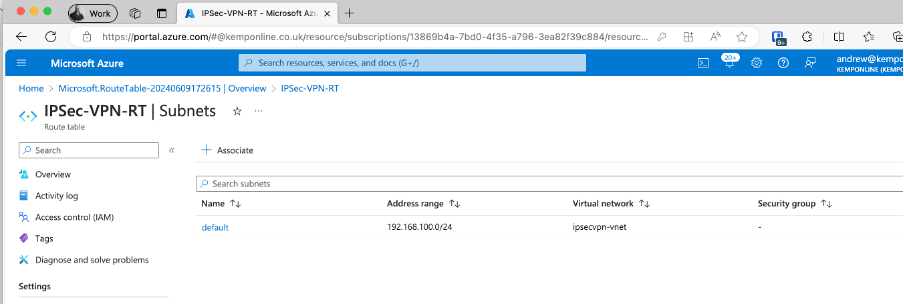
Add additional subnets if you have multiple subnets in the Azure vNet.
This then enables all VM’s you attach to the Azure vNet will use the strongSwan server as its gateway for access to any of the local subnets.
Conclusion
If you are looking for a cost effective Site-to-Site IPSec VPN to Azure for a lab environment this is by far the simplest and in my view the best way. However, I must stress this is for a home/lab setup, it is not recommended for production, you should use either Virtual Network Gateway or a recommended virtual appliance.
I tried this with using DNS names as opposed to IP Addresses but it did not want to connect, I wanted to try via DNS as my public IP address to my UDM is assigned via DHCP. So, remember, you’ll need to update the settings as and when your IP address updates if your public IP addresses is assigned via DHCP.