
So this is part 4 of my multi part series on my journey with Bicep and ARM Templates and deploying AVD as a PAW..
- Part 1 – A high level overview
- Part 2 – The core components
- Part 3 – Deploying the session hosts
- Part 4 – Completing the setup
- Part 6 – Securing Access
- Part 7 – Logging on to AVD
Introduction
In this part I’ll go through what I did to complete the basic setup, this will then enable you to log on to the Azure Virtual Desktop PAW’s from the Windows App as your privileged account user. This is not complete yet as there is some more work to do with regards to locking the session hosts down, setting up conditional access etc, but this will get you to a point where you have an operational AVD environment.
What needs to be done to be done now?
There are 2 steps needed here to use AVD as a PAW.
- User Roles – this is for any AVD deploymnet
- Add the Device Extension Attributes – This is for the conditional access policies
User Roles
The following needs to be done for any AVD environment, to enable user log on.
In order to log on to AVD you need to provide users the ability to log on to the session hosts. This is done via the Access Control (IAM) for either each session host, or at the Resource Group level (recommended). Here you can add the users to the Virtual Machine User Login Role

You can also add users to the Virtual Machine Administrator Login role

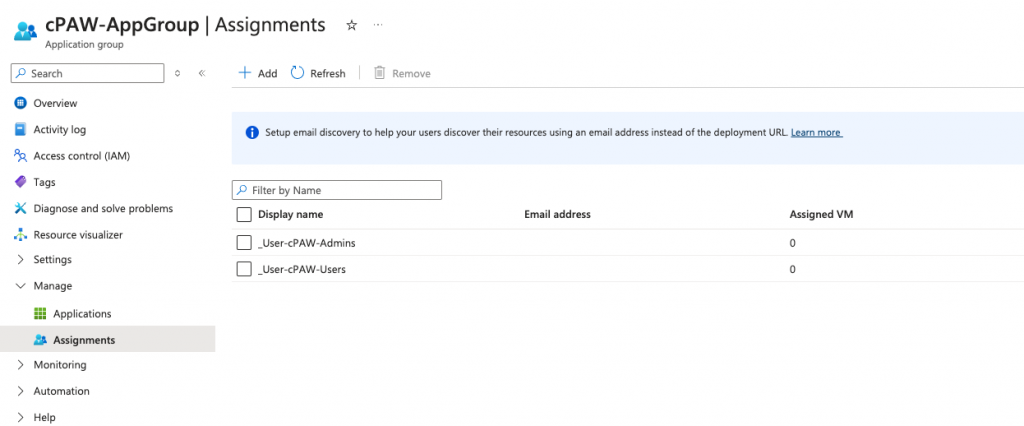
Now you can add the users one by one, but we all know thats not the best way. So, You’ll need to add 2 groups. User Login and Admin Login, then you can provide access to your users by simply adding users to those Entra Group.
These groups also need to be assigned to the Application Group of AVD.
At this point you’re able to log on to AVD as the user.
Device Extension Attributes
In order to lock down access so that the privileged users can only access from the virtual/cloud PAW you need to set the Device extensionAttribute in Entra. This is done via the graph.
Automating the completion
Now, I am sure there is another way to do this, I am not an Azure Expert, or scripting expert by any means, so, if you know of a better way then please do let me know as I’m really keen to streamline this process. But, I decided to create a script that will do all the above for me. I figured there must be a way to do this via a script or template.
I had a go with a few templates but I just couldn’t get it to work, so I decided to try running this all via a script.
The script can be run from the Azure Shell if required or from a PowerShell Connection from your device if you prefer, however for my I have started t o find it easier to upload the script to the cloud shell and run from there.
The script I have create can be found here: CloudPAW/cPAWSetup.ps1 at main · andrew-kemp/CloudPAW
Uploading the script to Azure Cloud Shell
its pretty simple to upload the script to Azure Cloud Shell. Click on the Manage Files option and click on Upload:
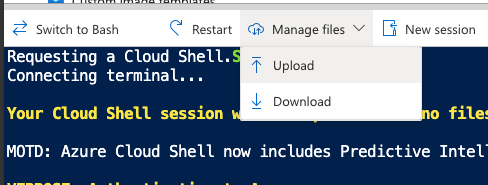
Locate the script and then upload.
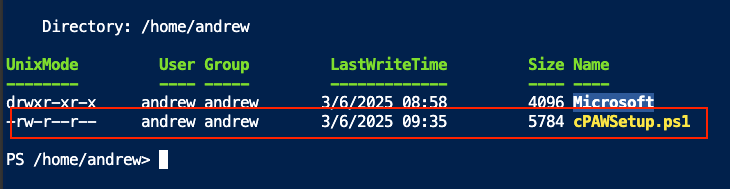
Once uploaded you should then see it listed:
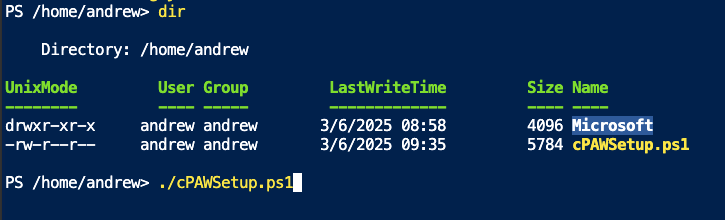
Run the script
You need to do the same as you would do with any other script to run it:
Enter the name of the script, in this case ./cPAWSetup.ps1
This is where you then enter the name of the Resource Group and Session Host Prefix, which is why I kept it all the same cPAW in the previous posts:

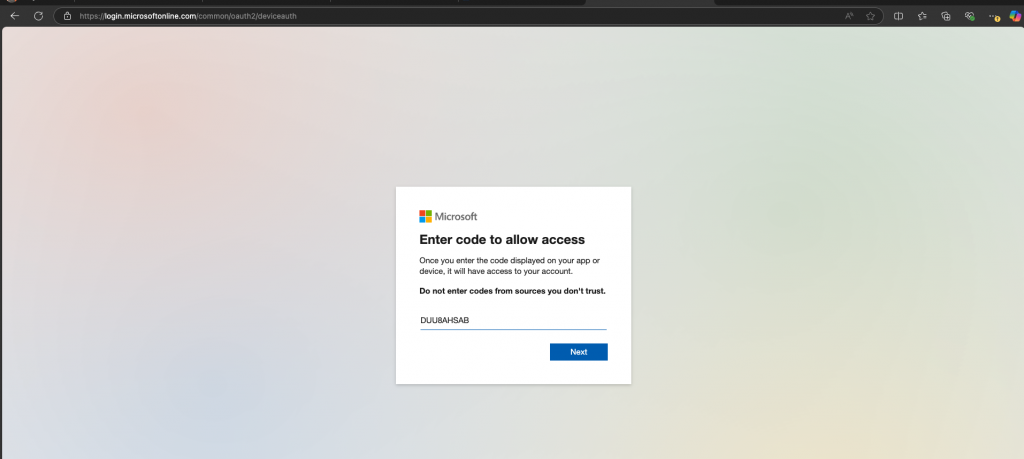
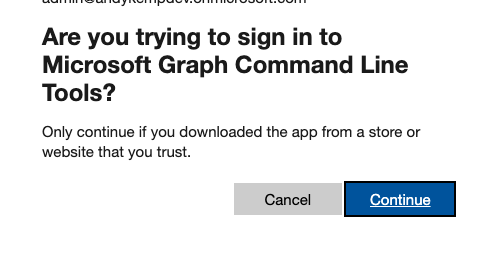
It will then as you to authenticate via a device code:

Open a browser and go to https://aka.ms/devicecode and then enter the code that you are provided with and click Next
Sign in with your current privileged credentials and follow the prompts and then confirm that you are signing in via the Microsoft Graph Command Line Tools.
The script will then go and pull a list of all your subscriptions that you have and will ask you to select the appropriate subscription:
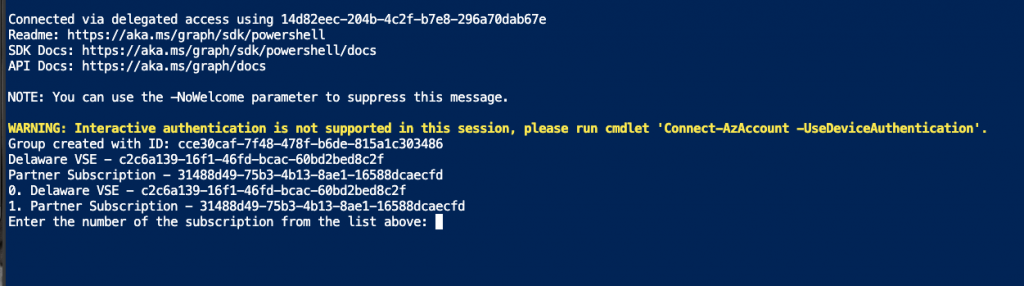
It will then run all the commands agains that subscription and resource group specified, and also connects to the Graph to create the required Groups and also sets the Device extentionAttribute1 value.
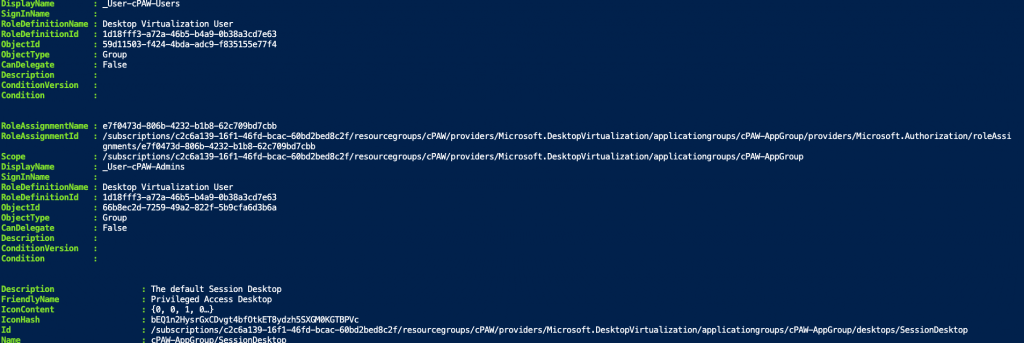
Once completed you will see that the following has been done in Entra and Azure:
The devices now how the extensionAttribute1 set as cloud Privileged Access Workstation and several permissions have been added to the resource group to allow users to log on to the session hosts but also allow the session hosts to start on VM connect.

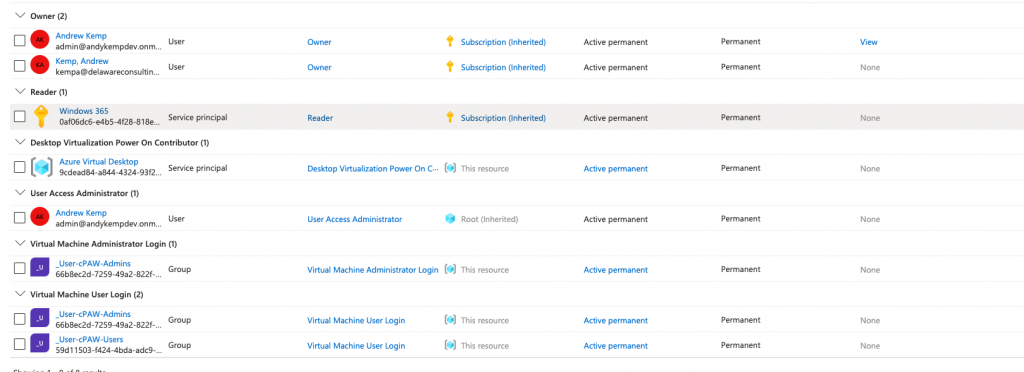
2 Groups are created 1 to allow admin log on to the session hosts and 1 to allow user log on:
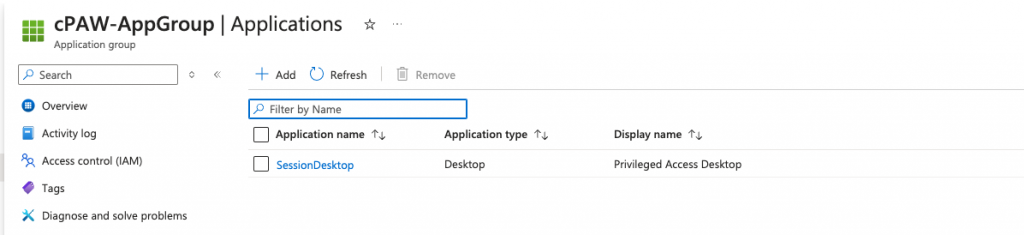
And the display name of the applications (in this case the desktop) has been named to a more friendly name of Privileged Access Desktop.
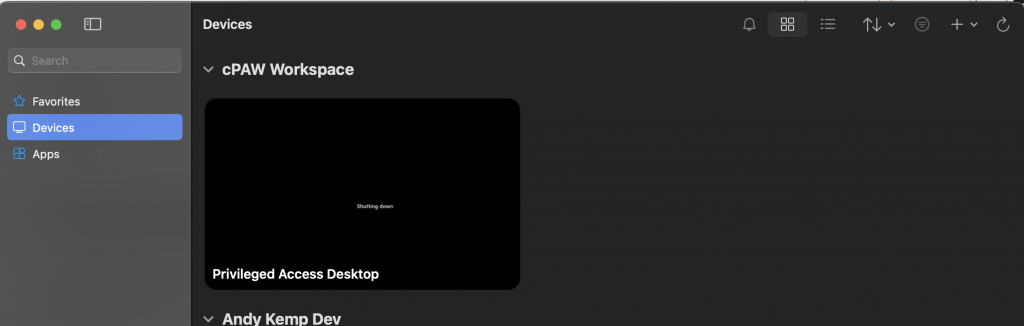
Add your users who you want to allow access to these session hosts in the user _cPAW-Users user group and then add a new Work/School account to the Windows App and you will then see the available cloud PAW:
Conclusion
You now have an AVD Environment ready to be used as a cloud PAW. In fact, you could modify the scripts and process in a way to work to your own advantage to then use for AVD in general.
You have your sessions hosts configured with things like the Device extensionAttribute1 set as “cloud Privileged Access Workstation” ready for use with the conditional Access Policies that you will need to create next to only allow access to these devices to the admin centre’s.
Was this helpful?
Let me know what you think!